Installation Procedure
The following steps outline the recommended procedure for utilizing your Toyota Smart Access Cable.
Required Tools/Devices
- MPVI4/RTD4
- 8 mm socket or Phillips-head screwdriver
Disassembly
-
Disconnect the negative (-) battery terminal from the vehicle's battery.
-
Remove the driver side interior floor trim panel.
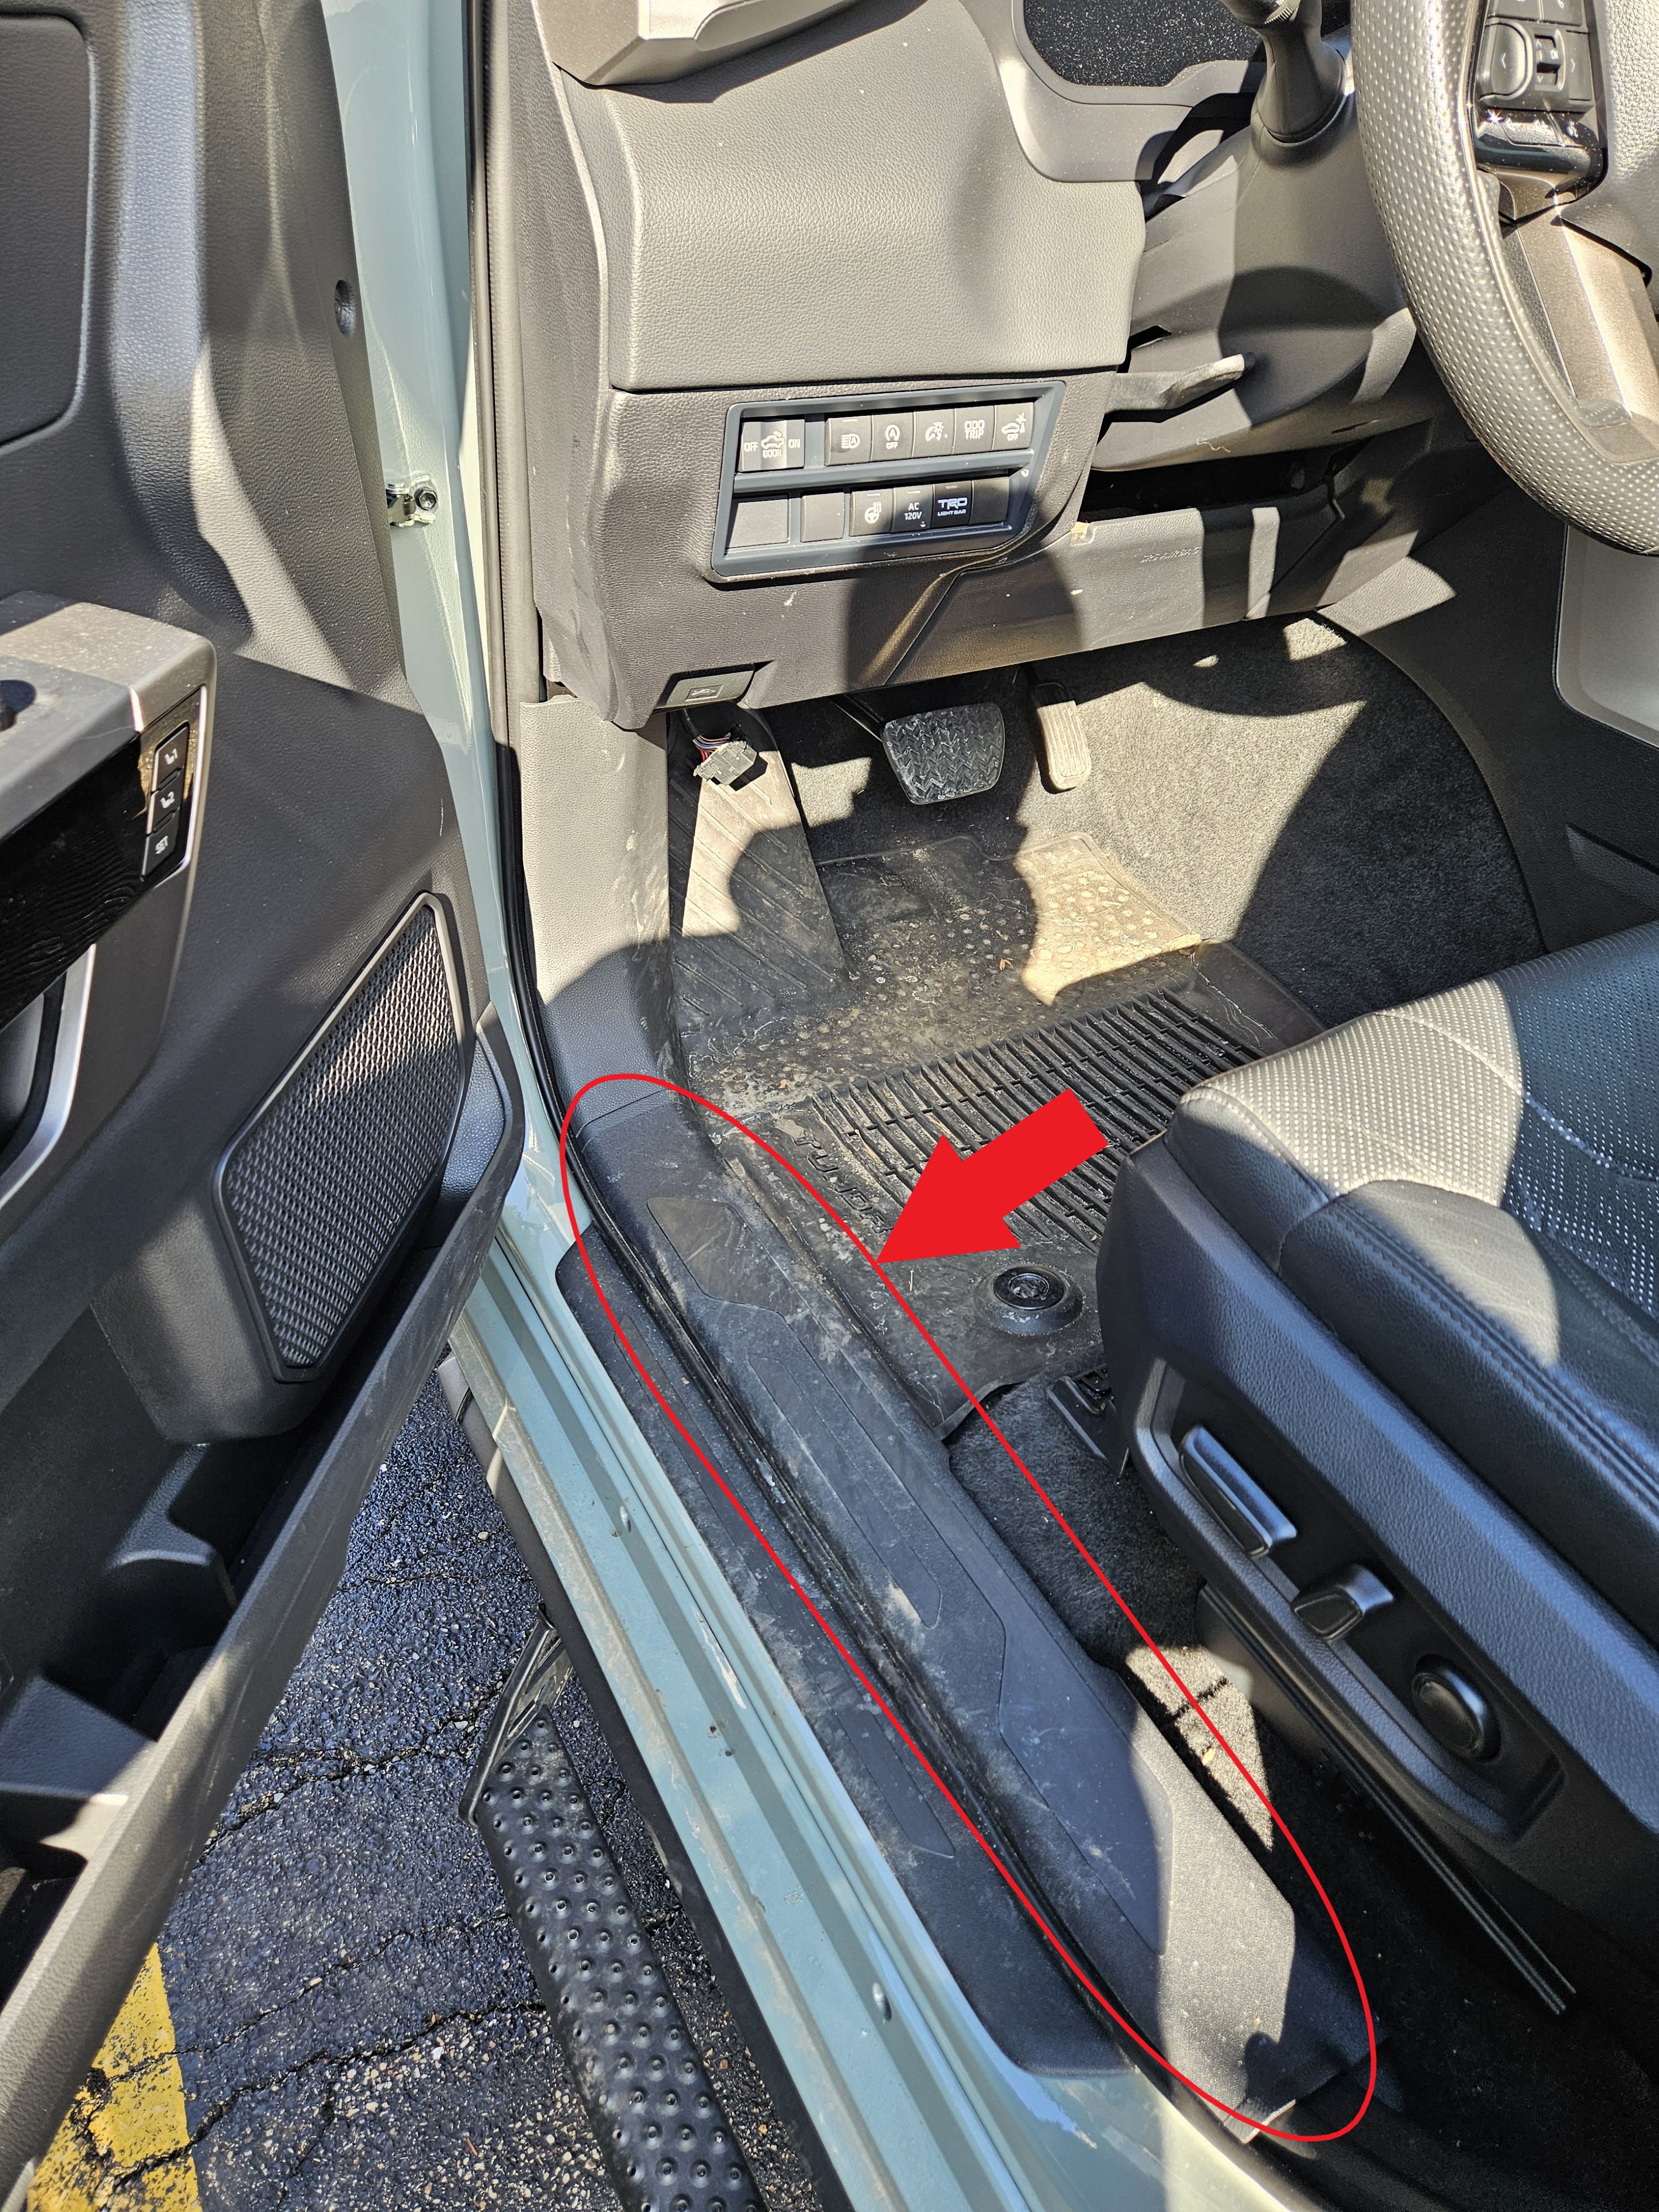
-
Remove the thumb screw located on the driver side foot trim panel at the back of the footwell.
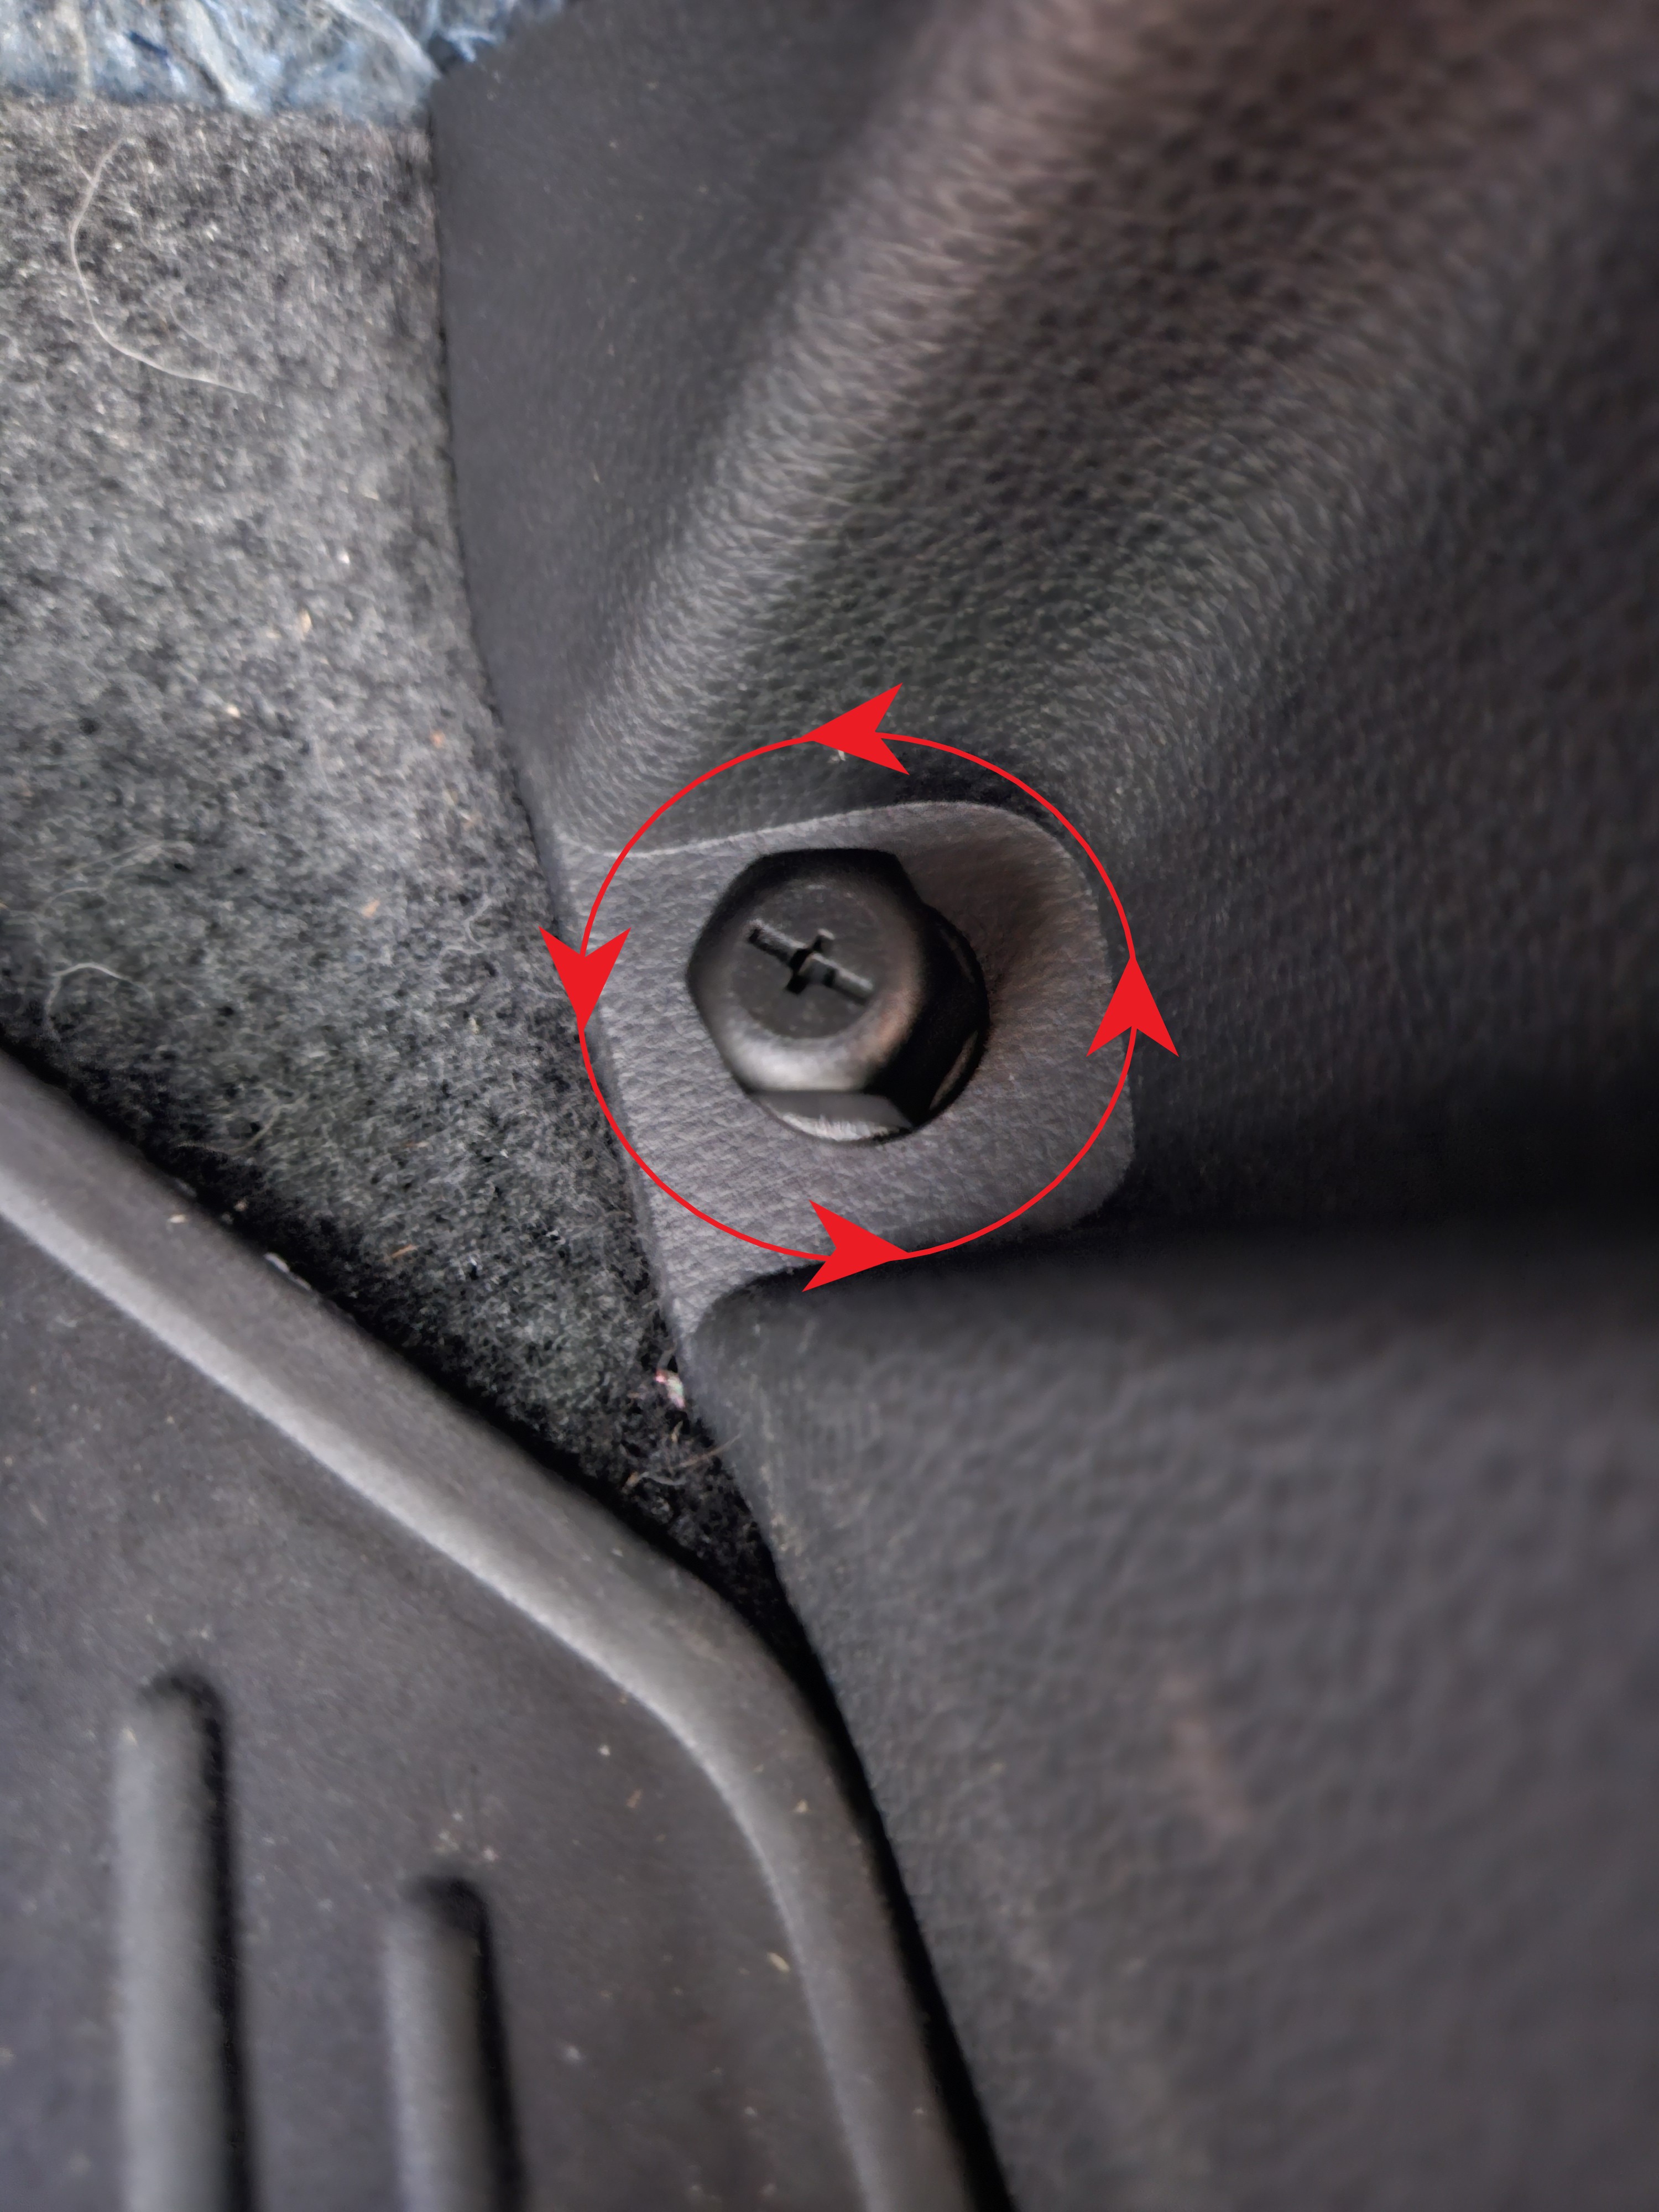
-
Remove the driver side interior foot trim panel.
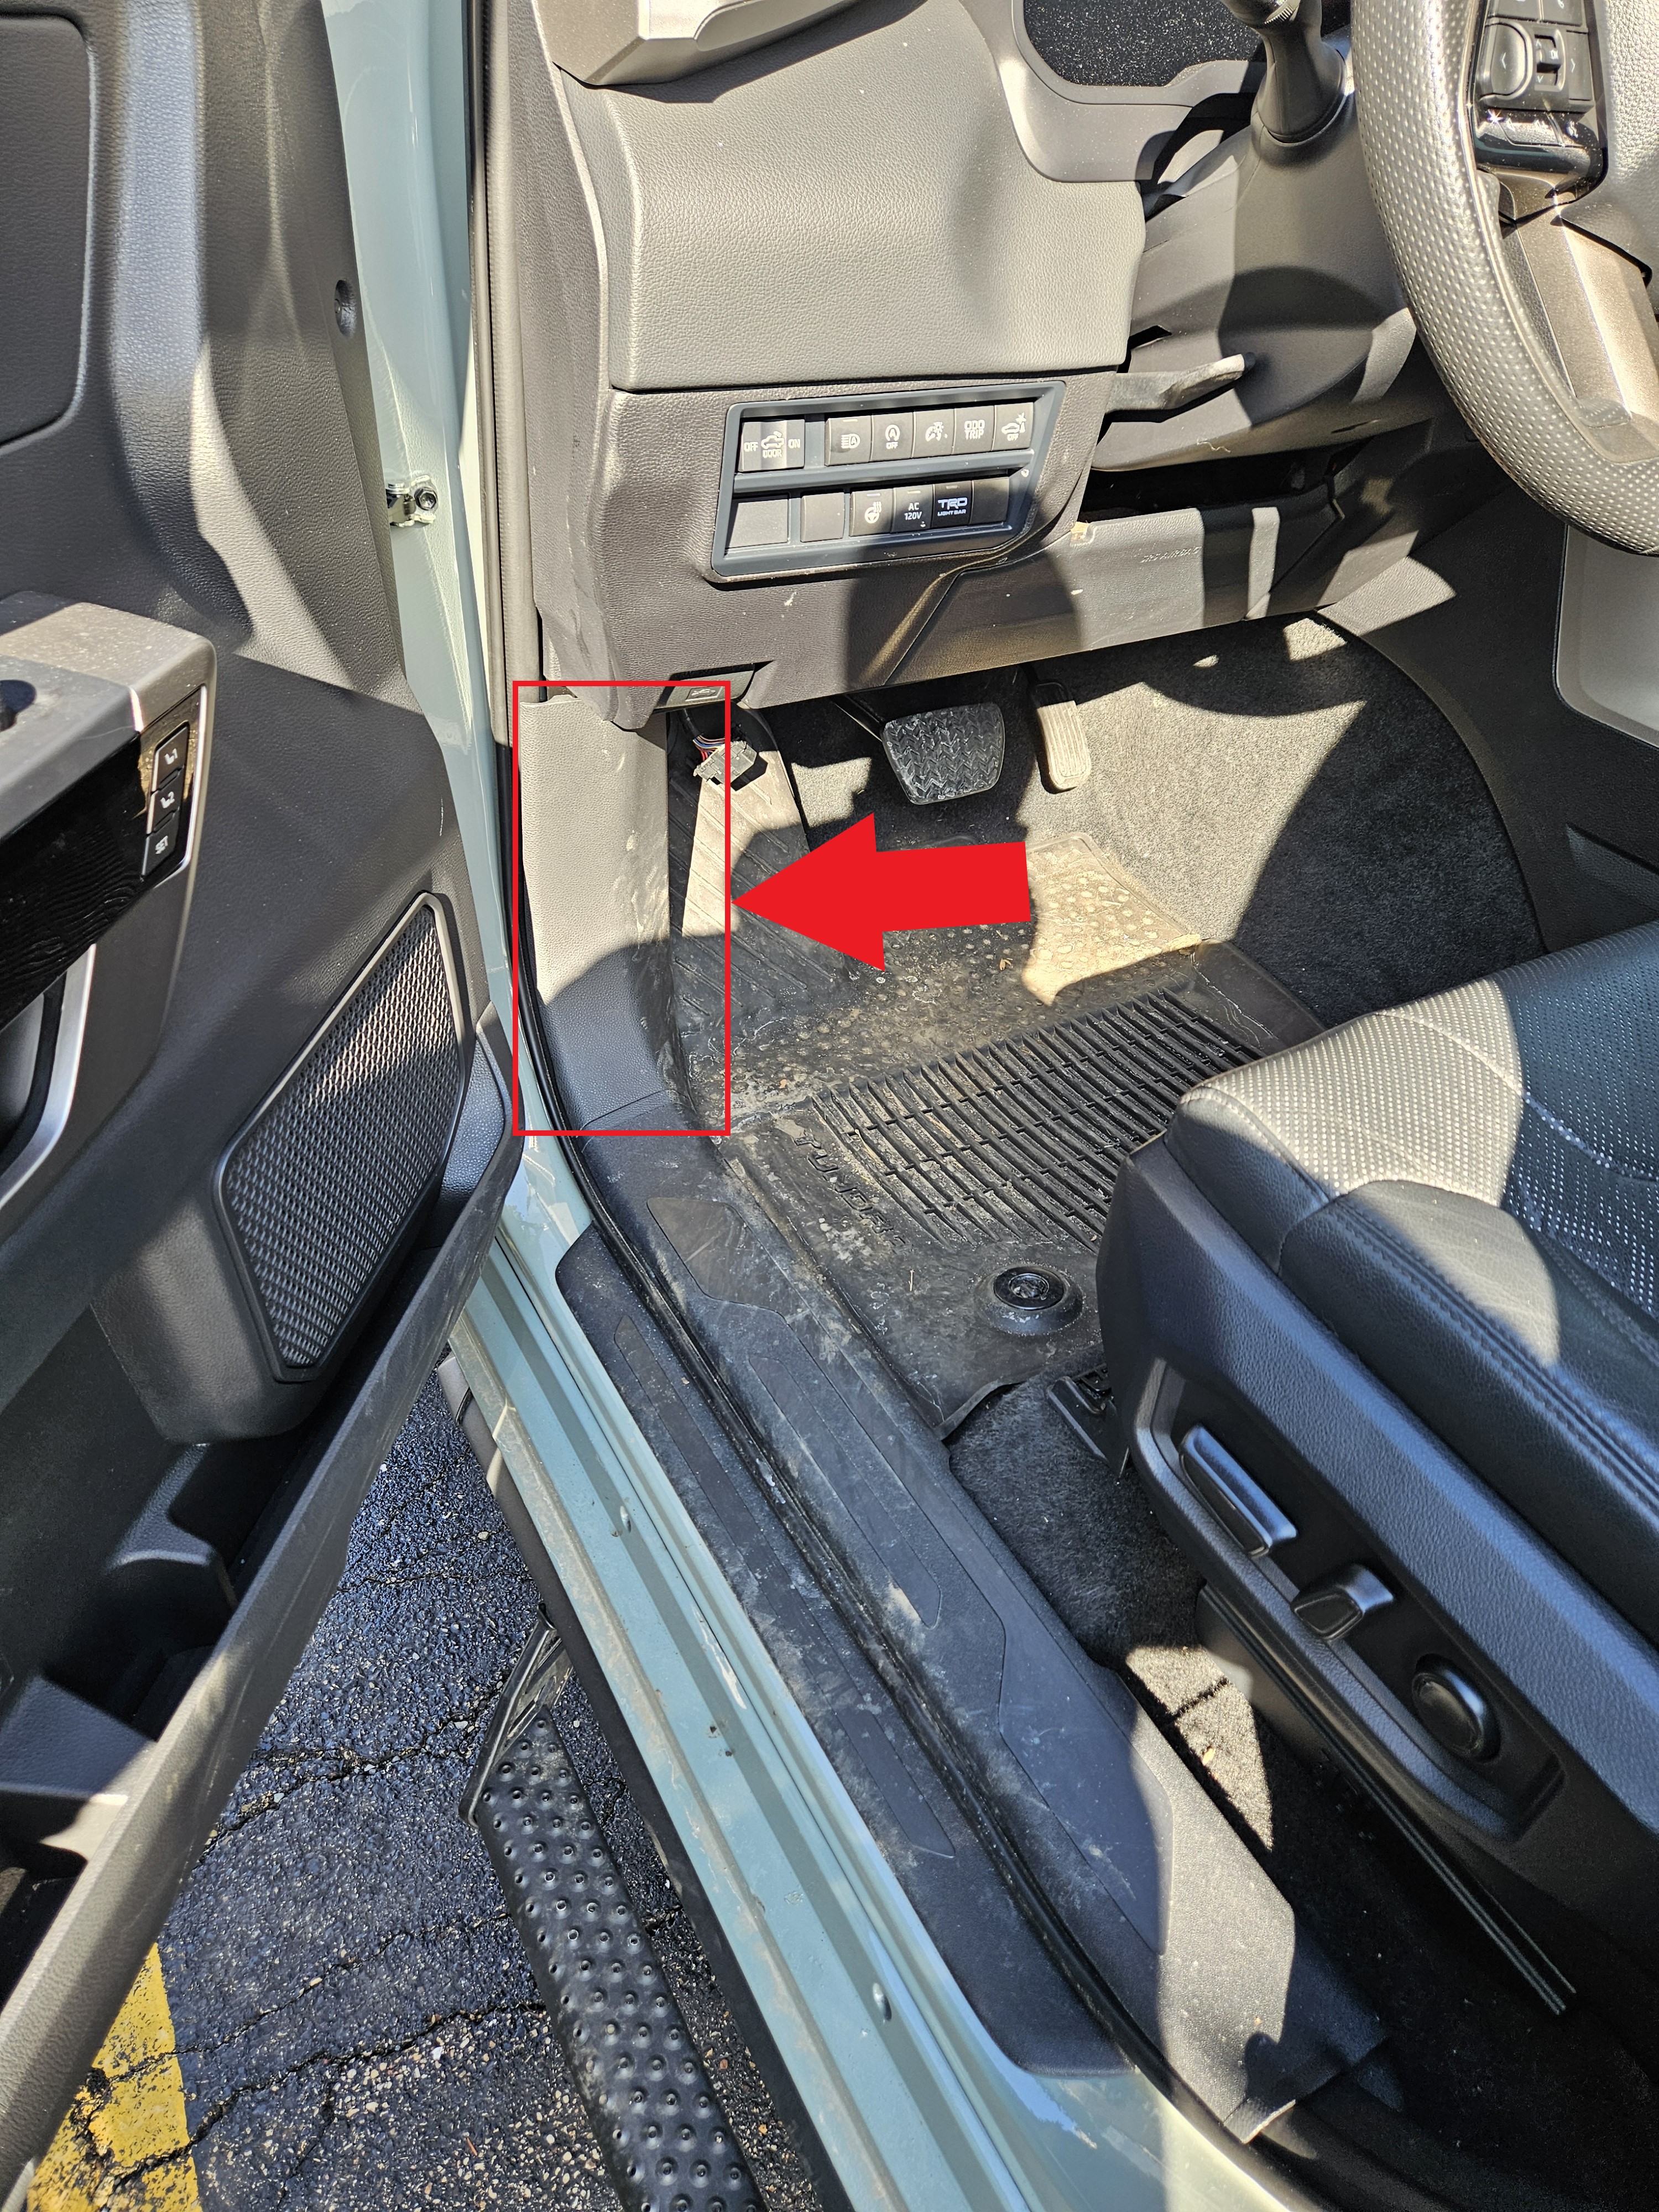
-
Using an 8 mm socket or Phillips-head screwdriver, remove the driver side lower dash instrument panel bolt.
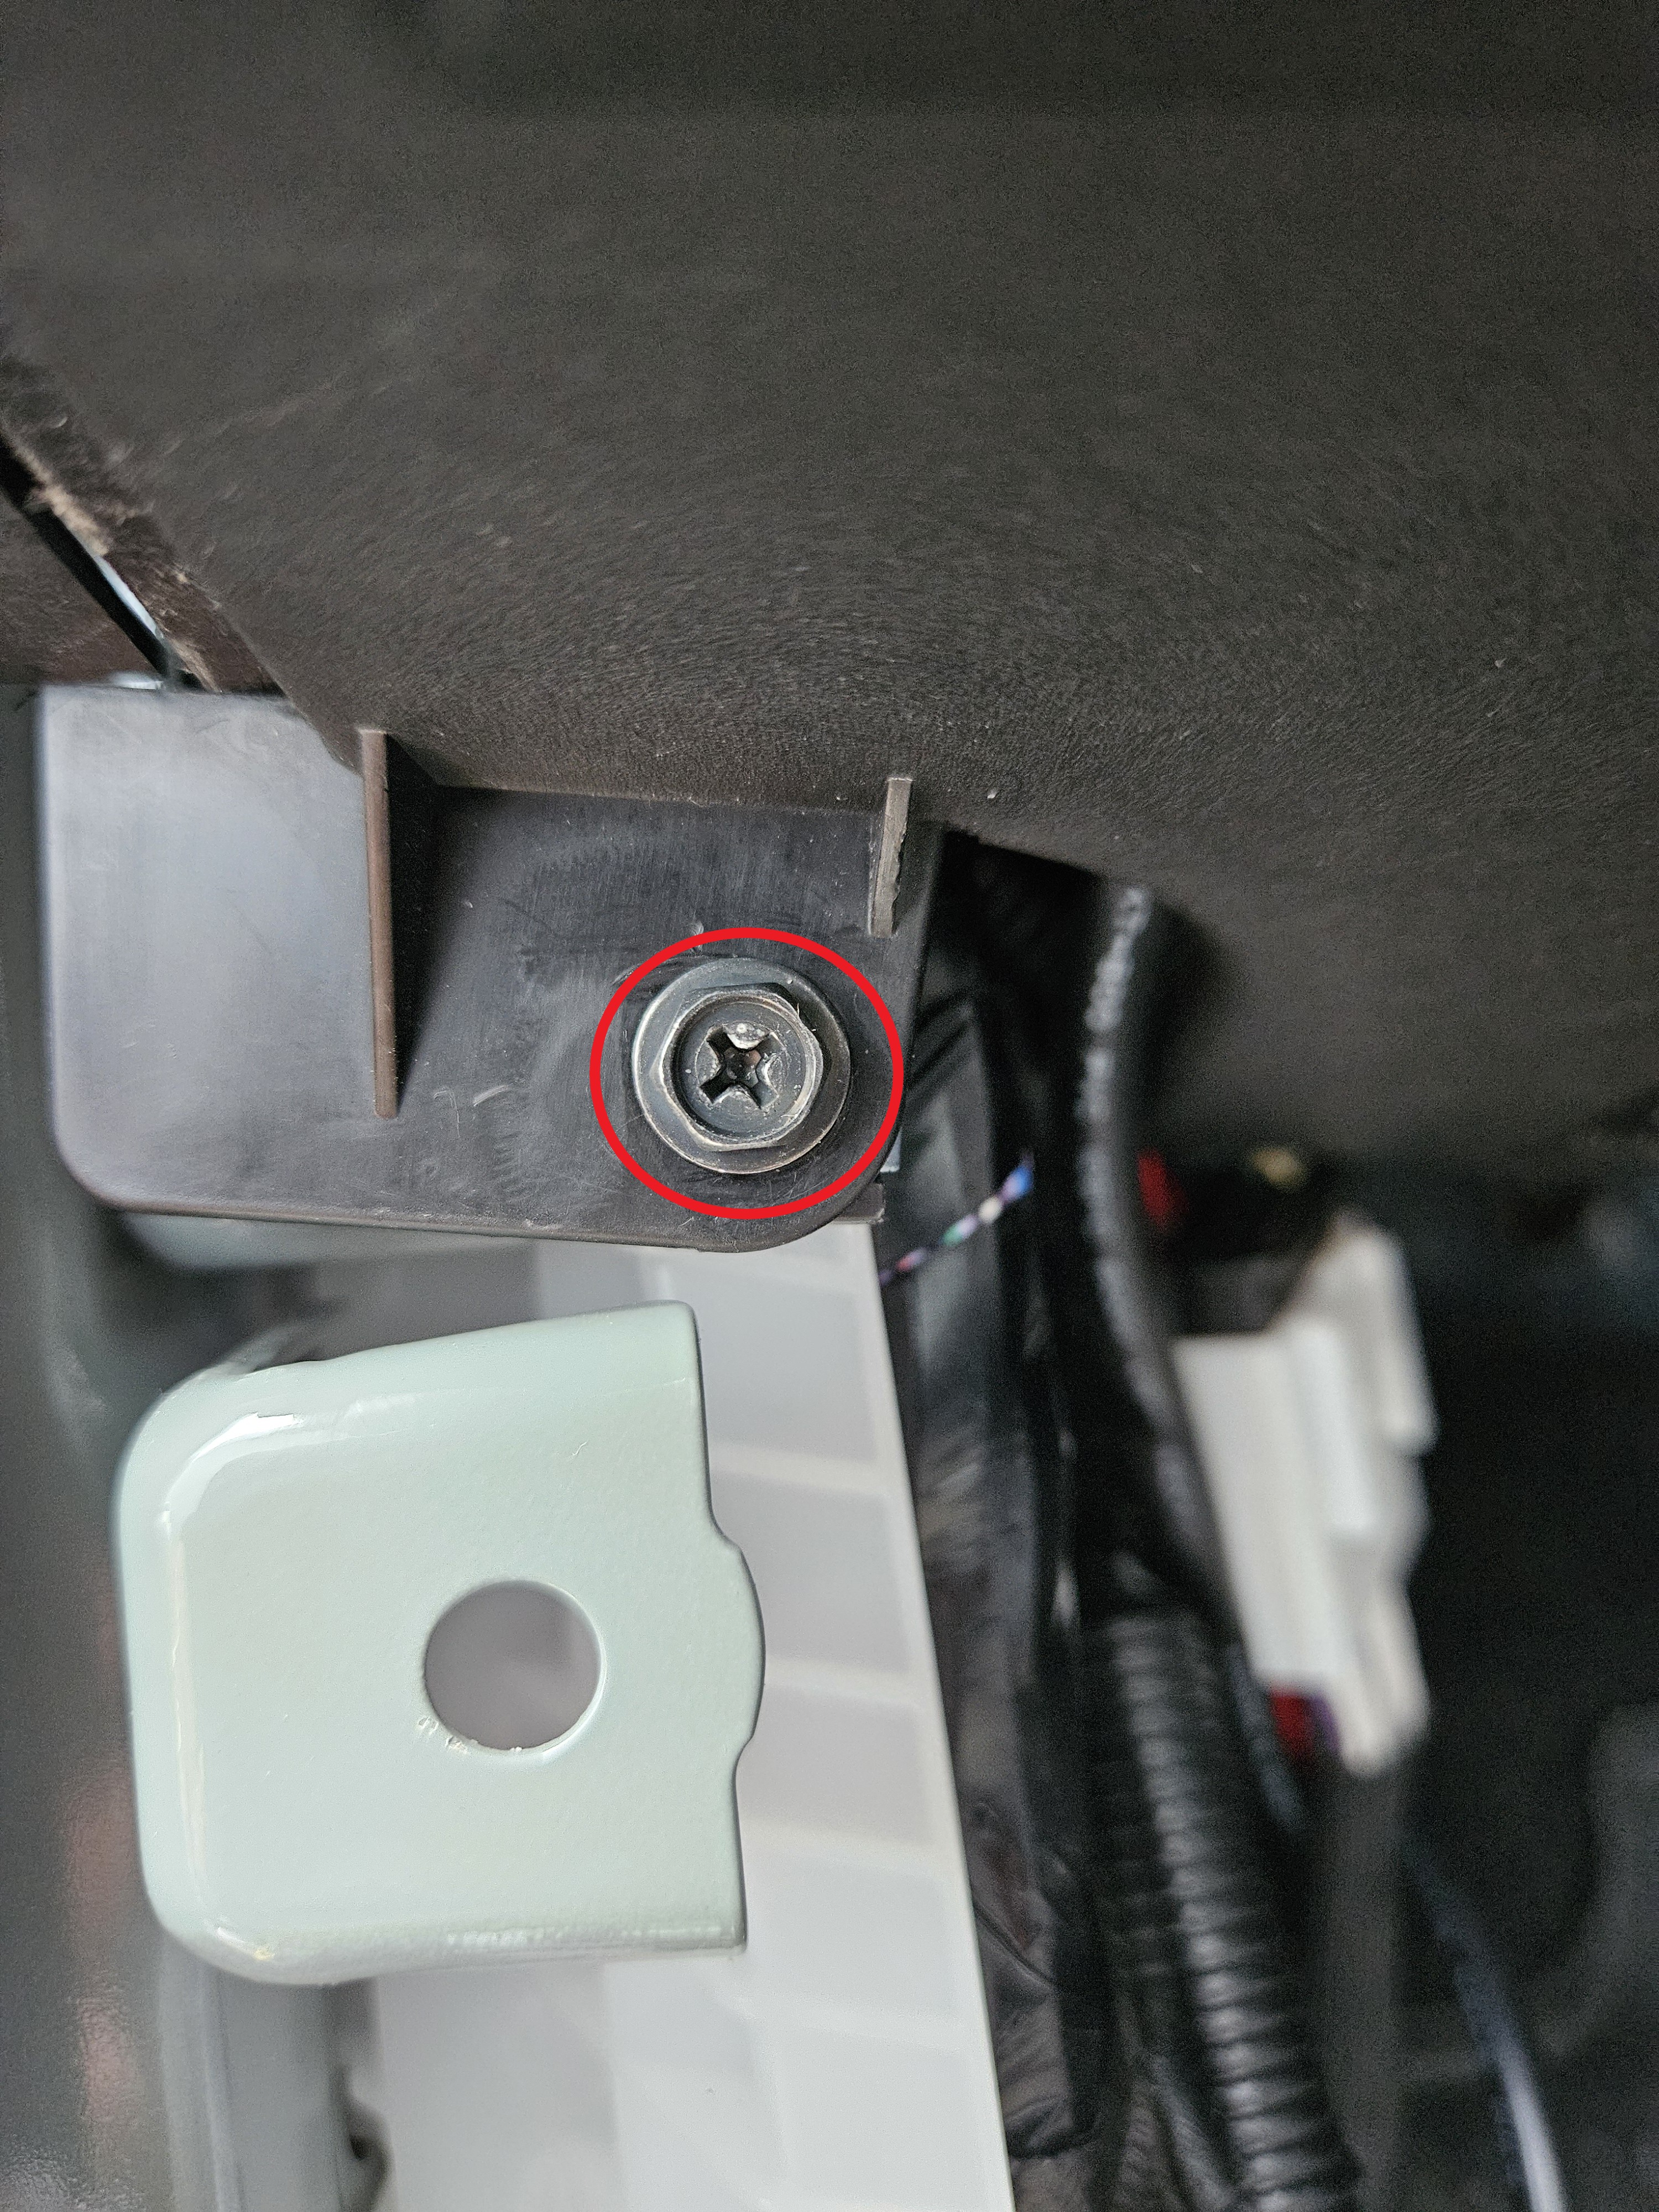
-
Remove the driver side lower dash instrument panel.
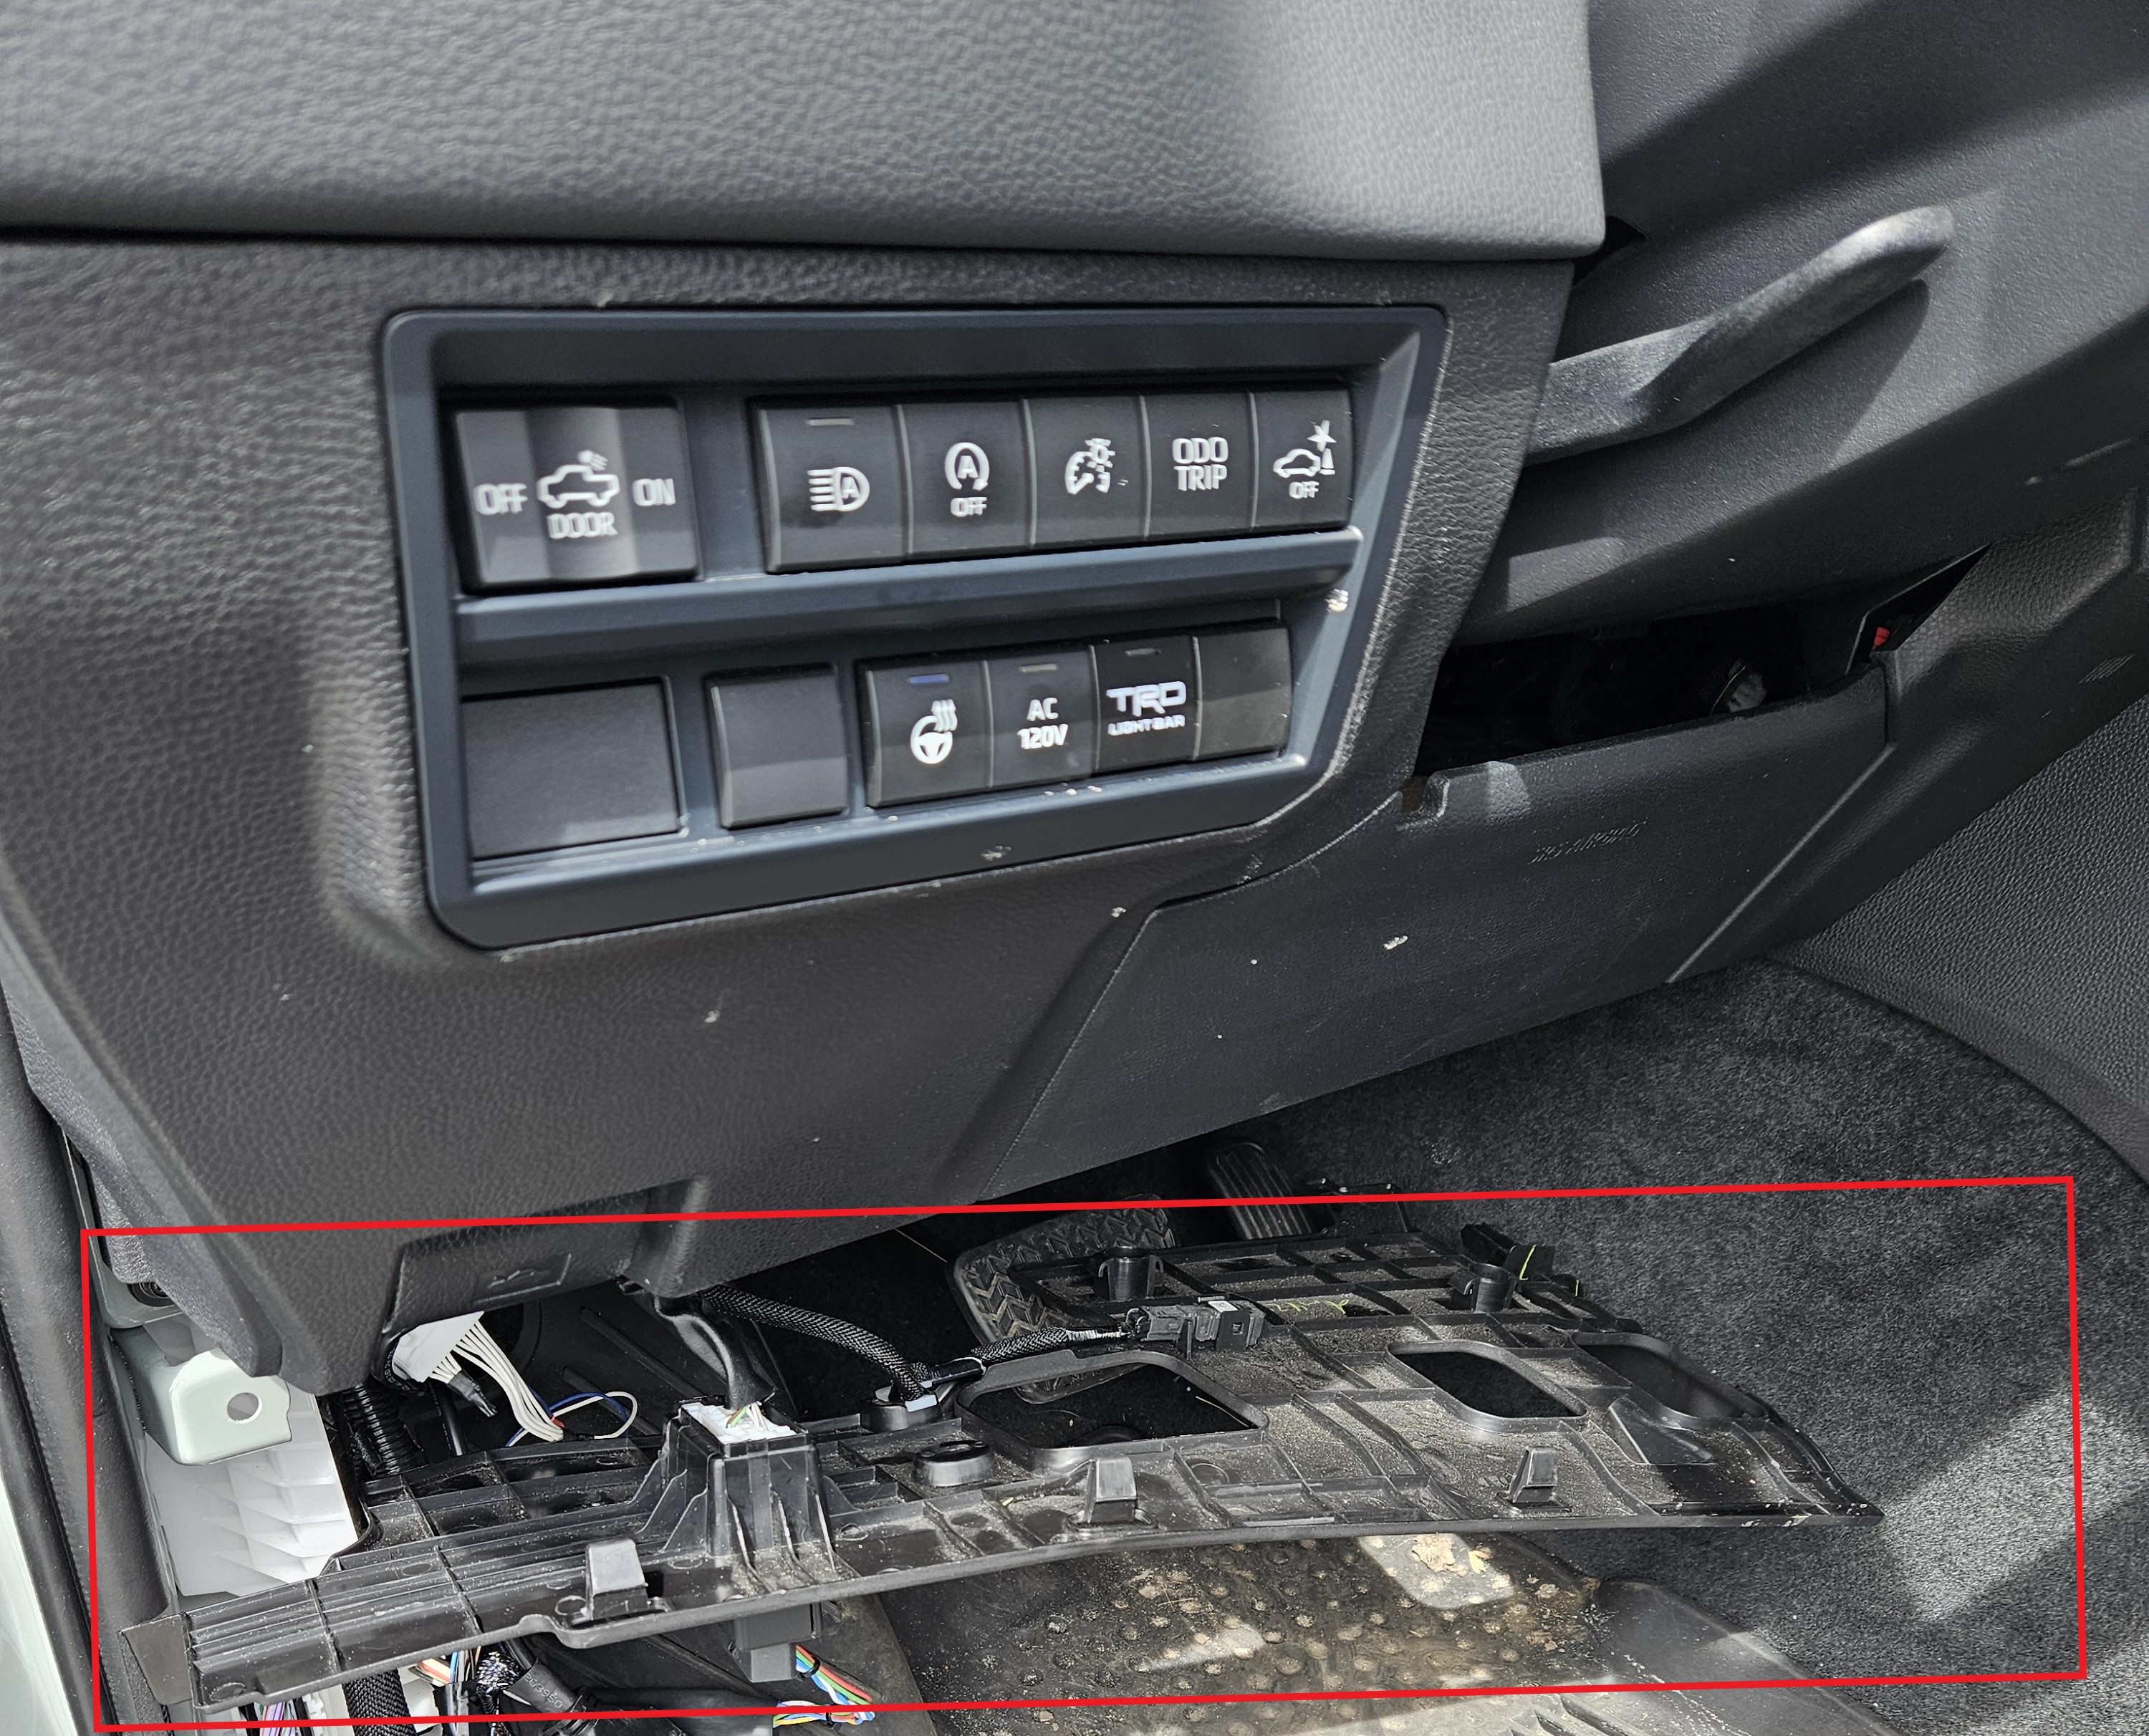
Note
On 2026 Tundras the lower dash instrument panel does not need to be removed to gain access to the junction connector.
-
Locate the junction connector on the top left hand side of the footwell.
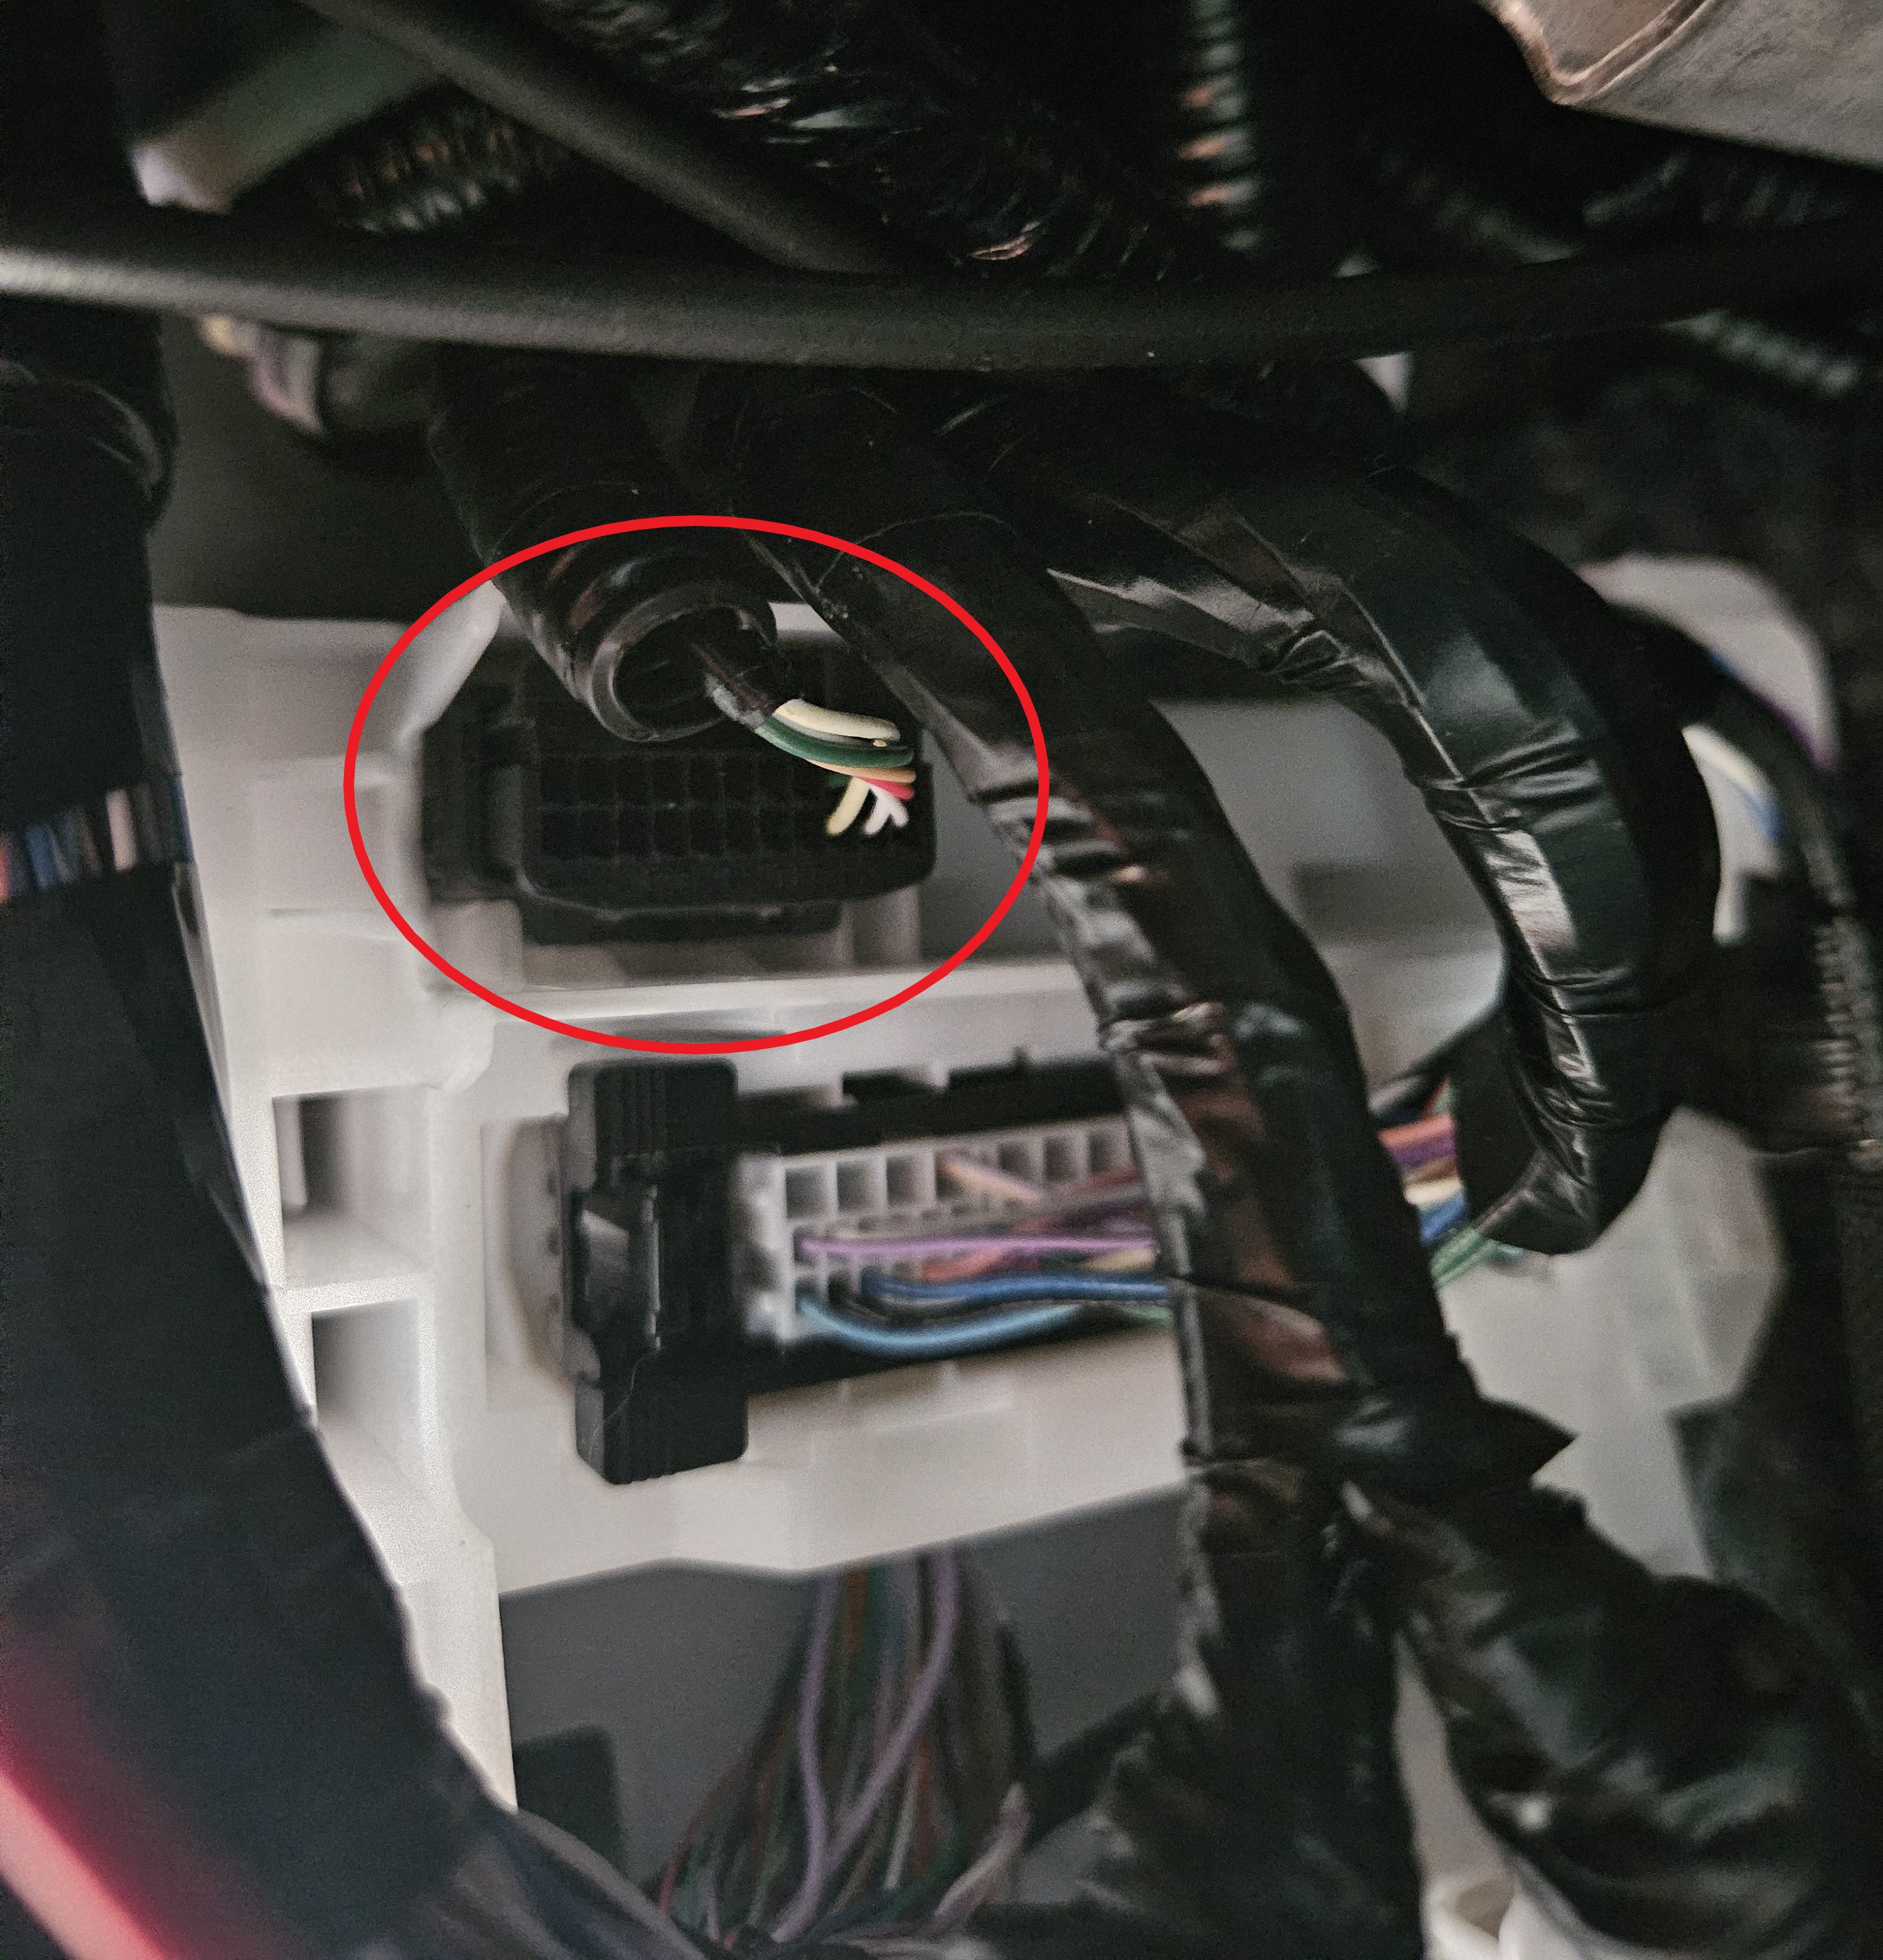
-
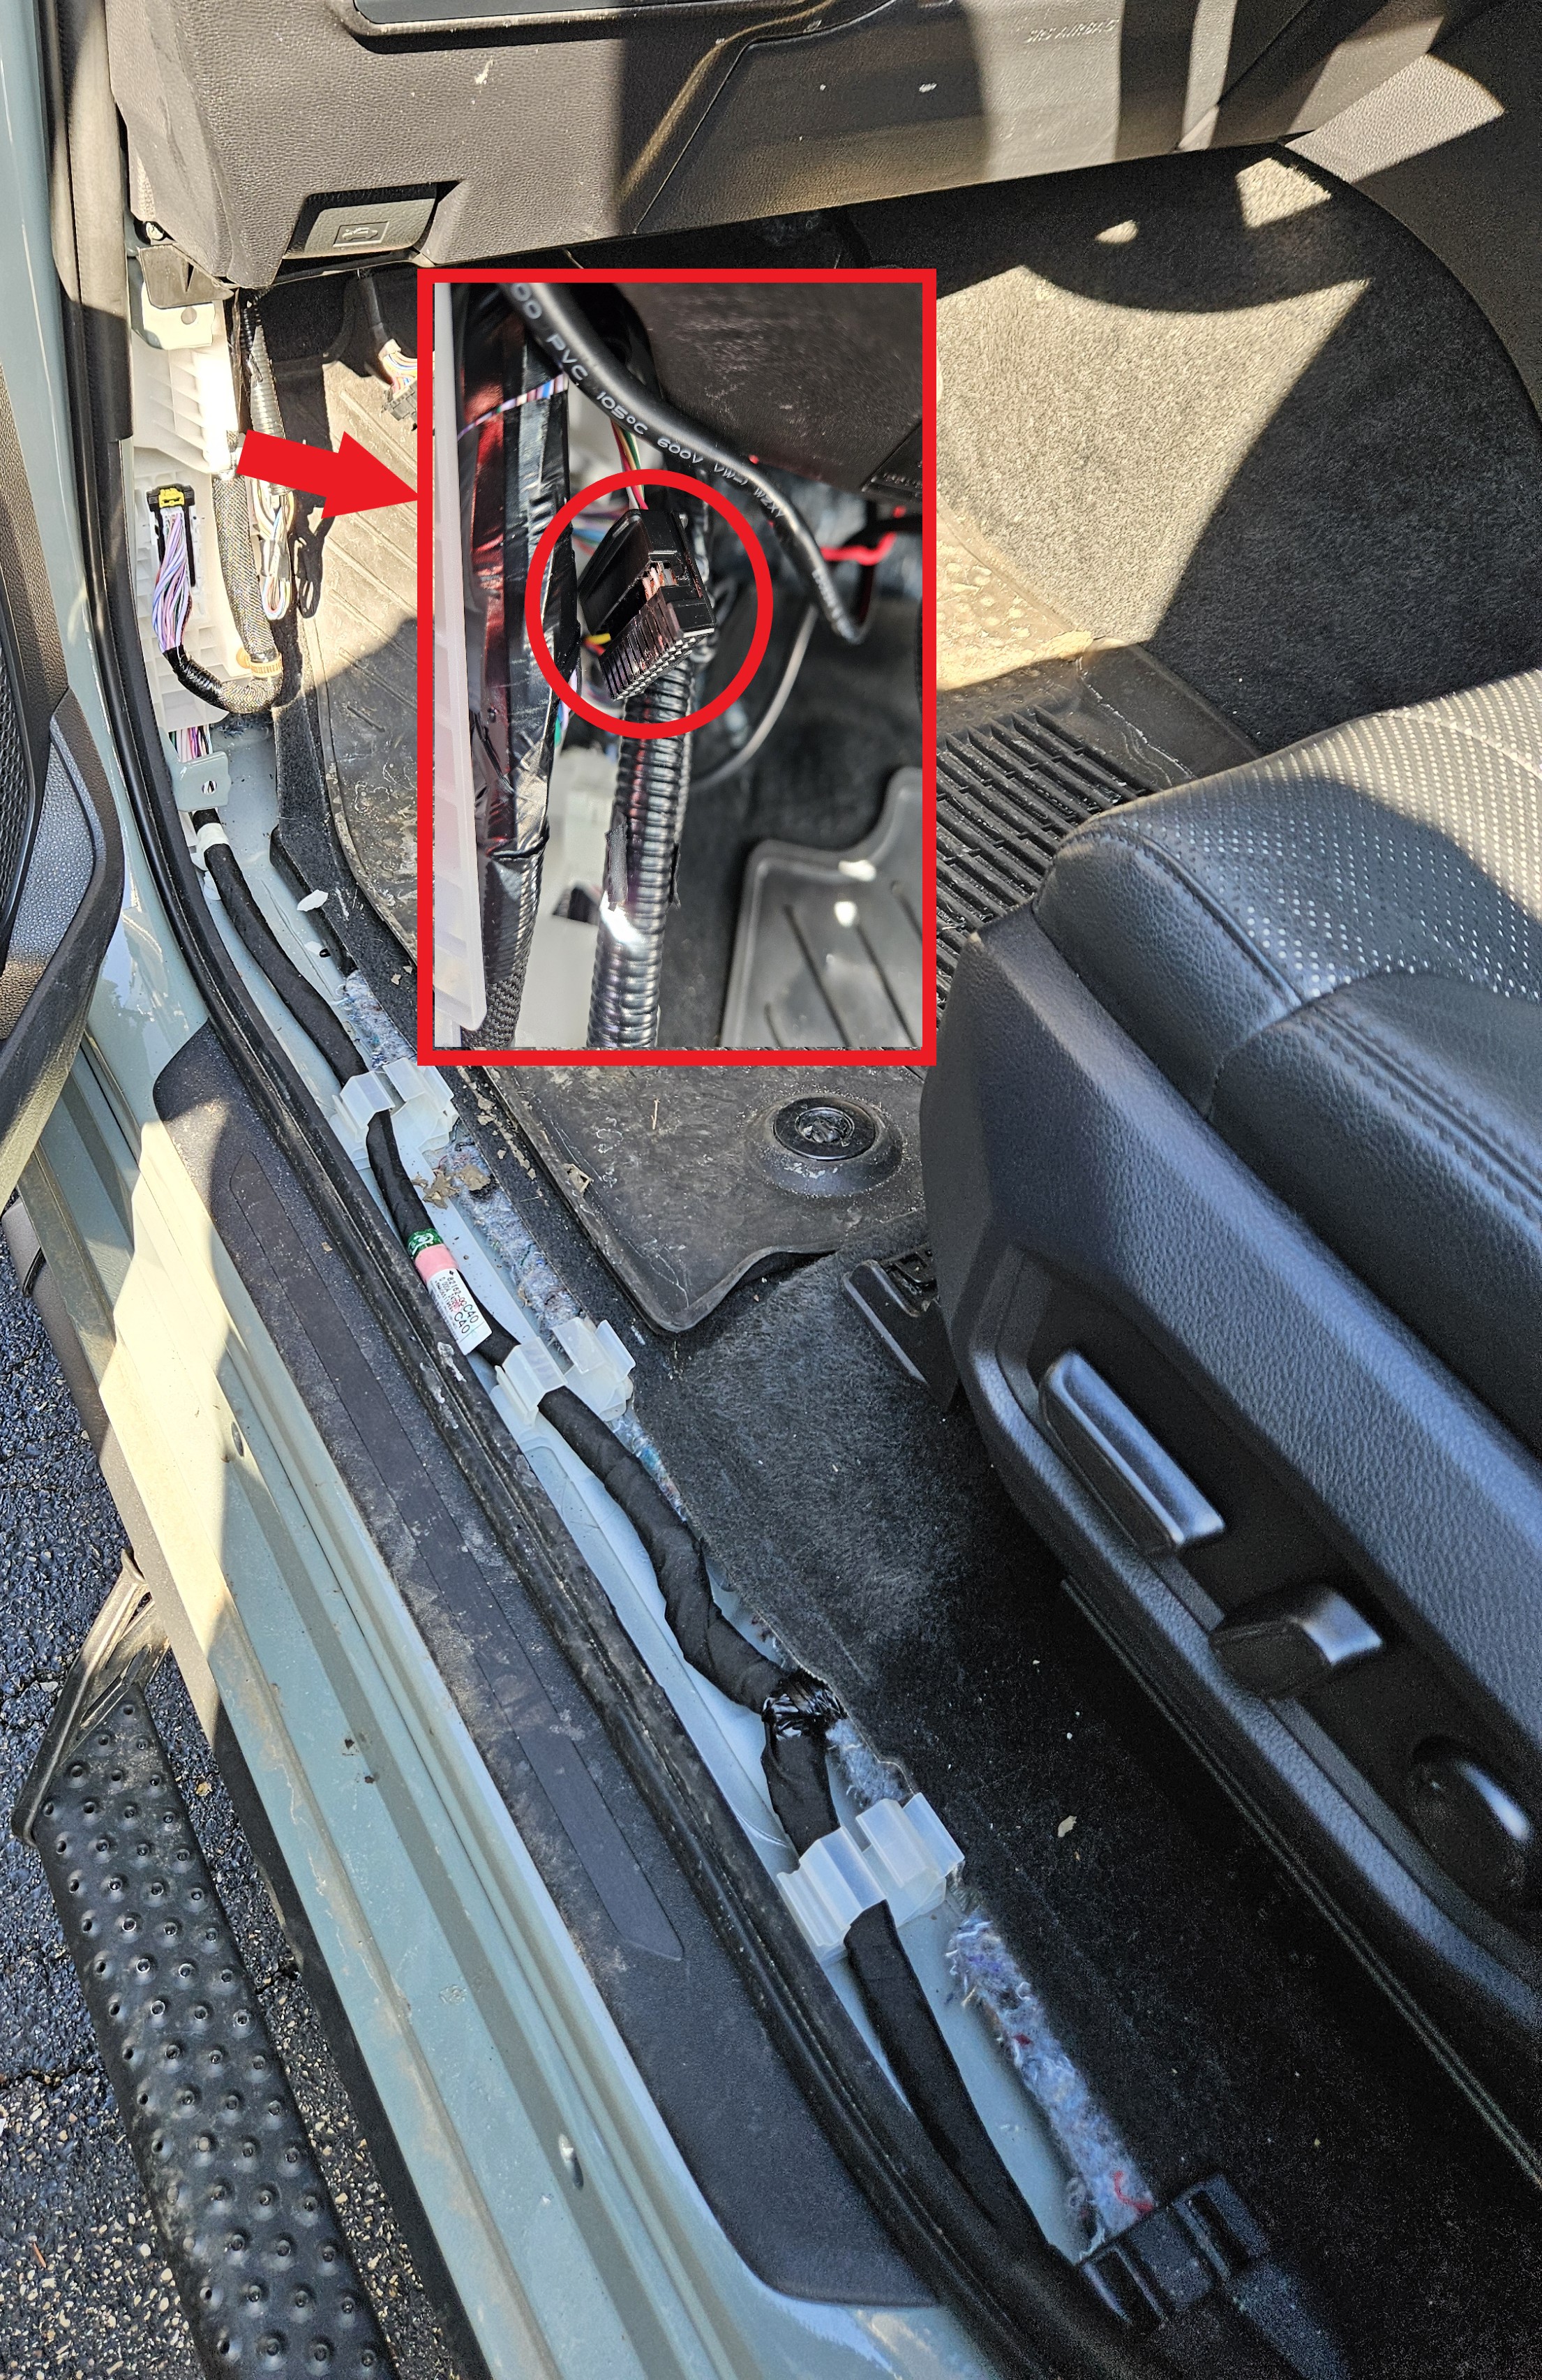
Disconnect the junction connector.
Note
Push down on the tab at the top of the connector.
Installation
-
Connect your smart access cable to the vehicle junction connector.
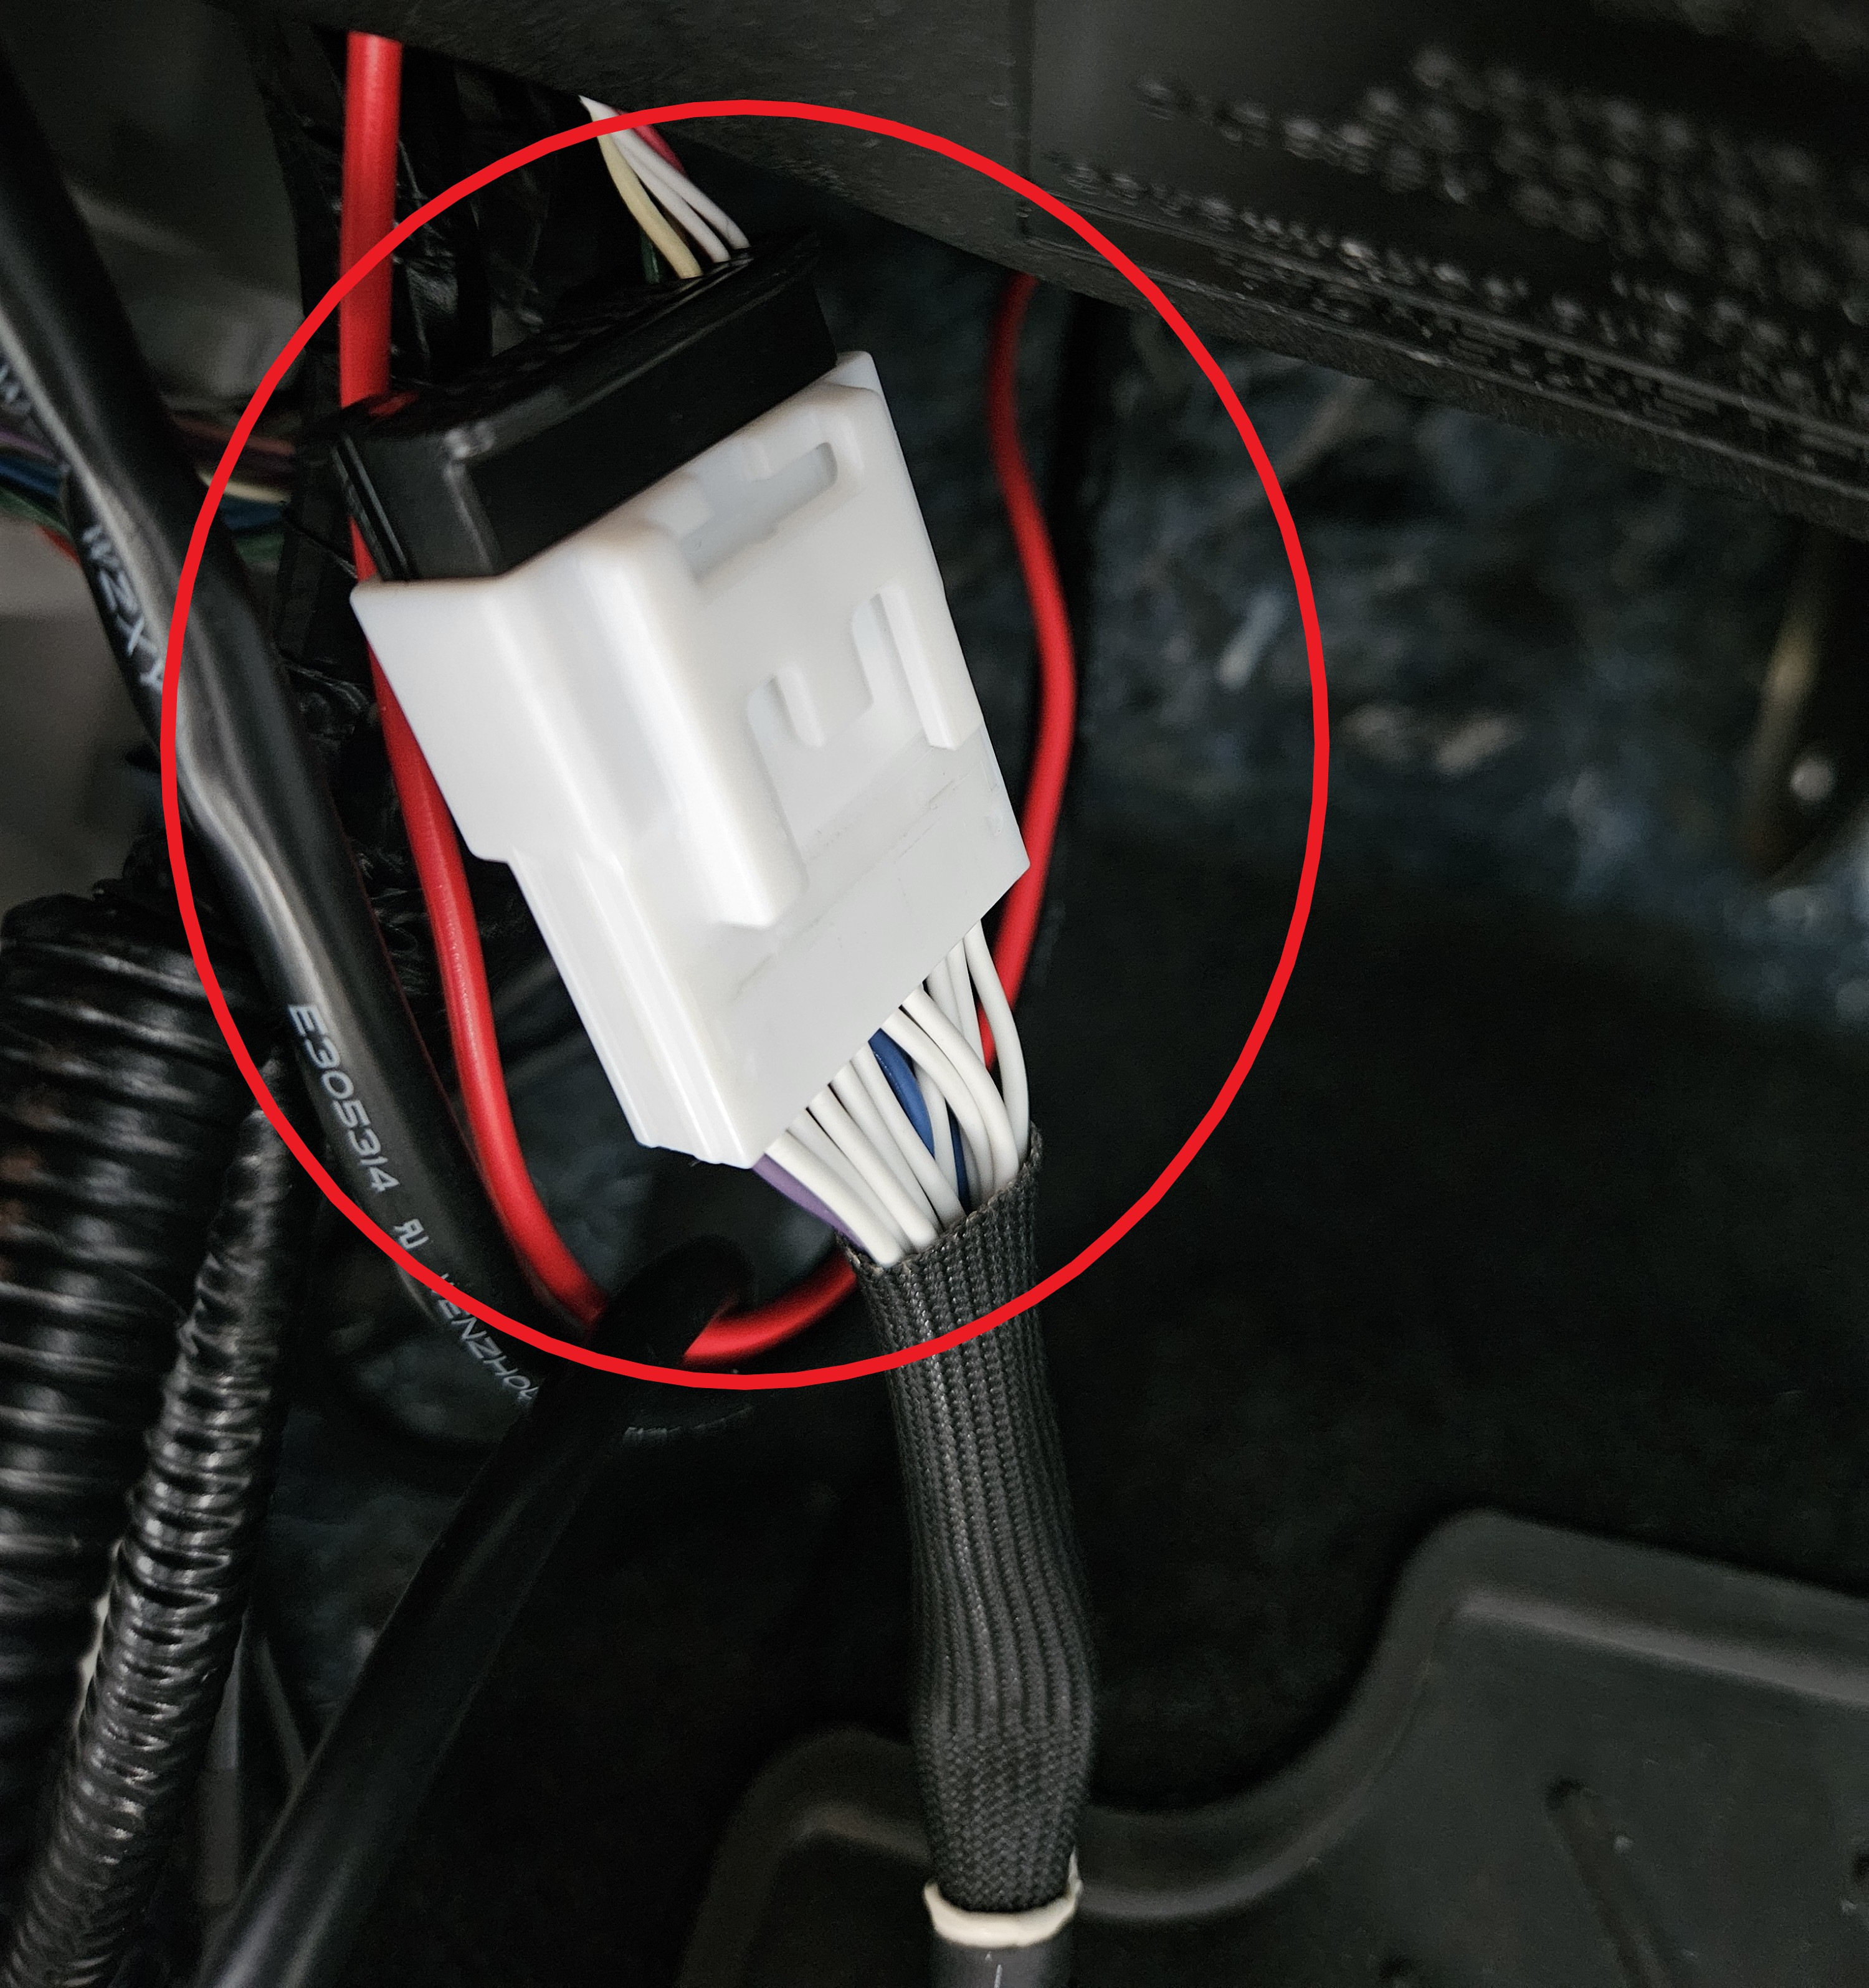
-
Reconnect the vehicle's negative (-) battery terminal.
-
Connect the opposite end of the smart access cable to the vehicle OBD port.
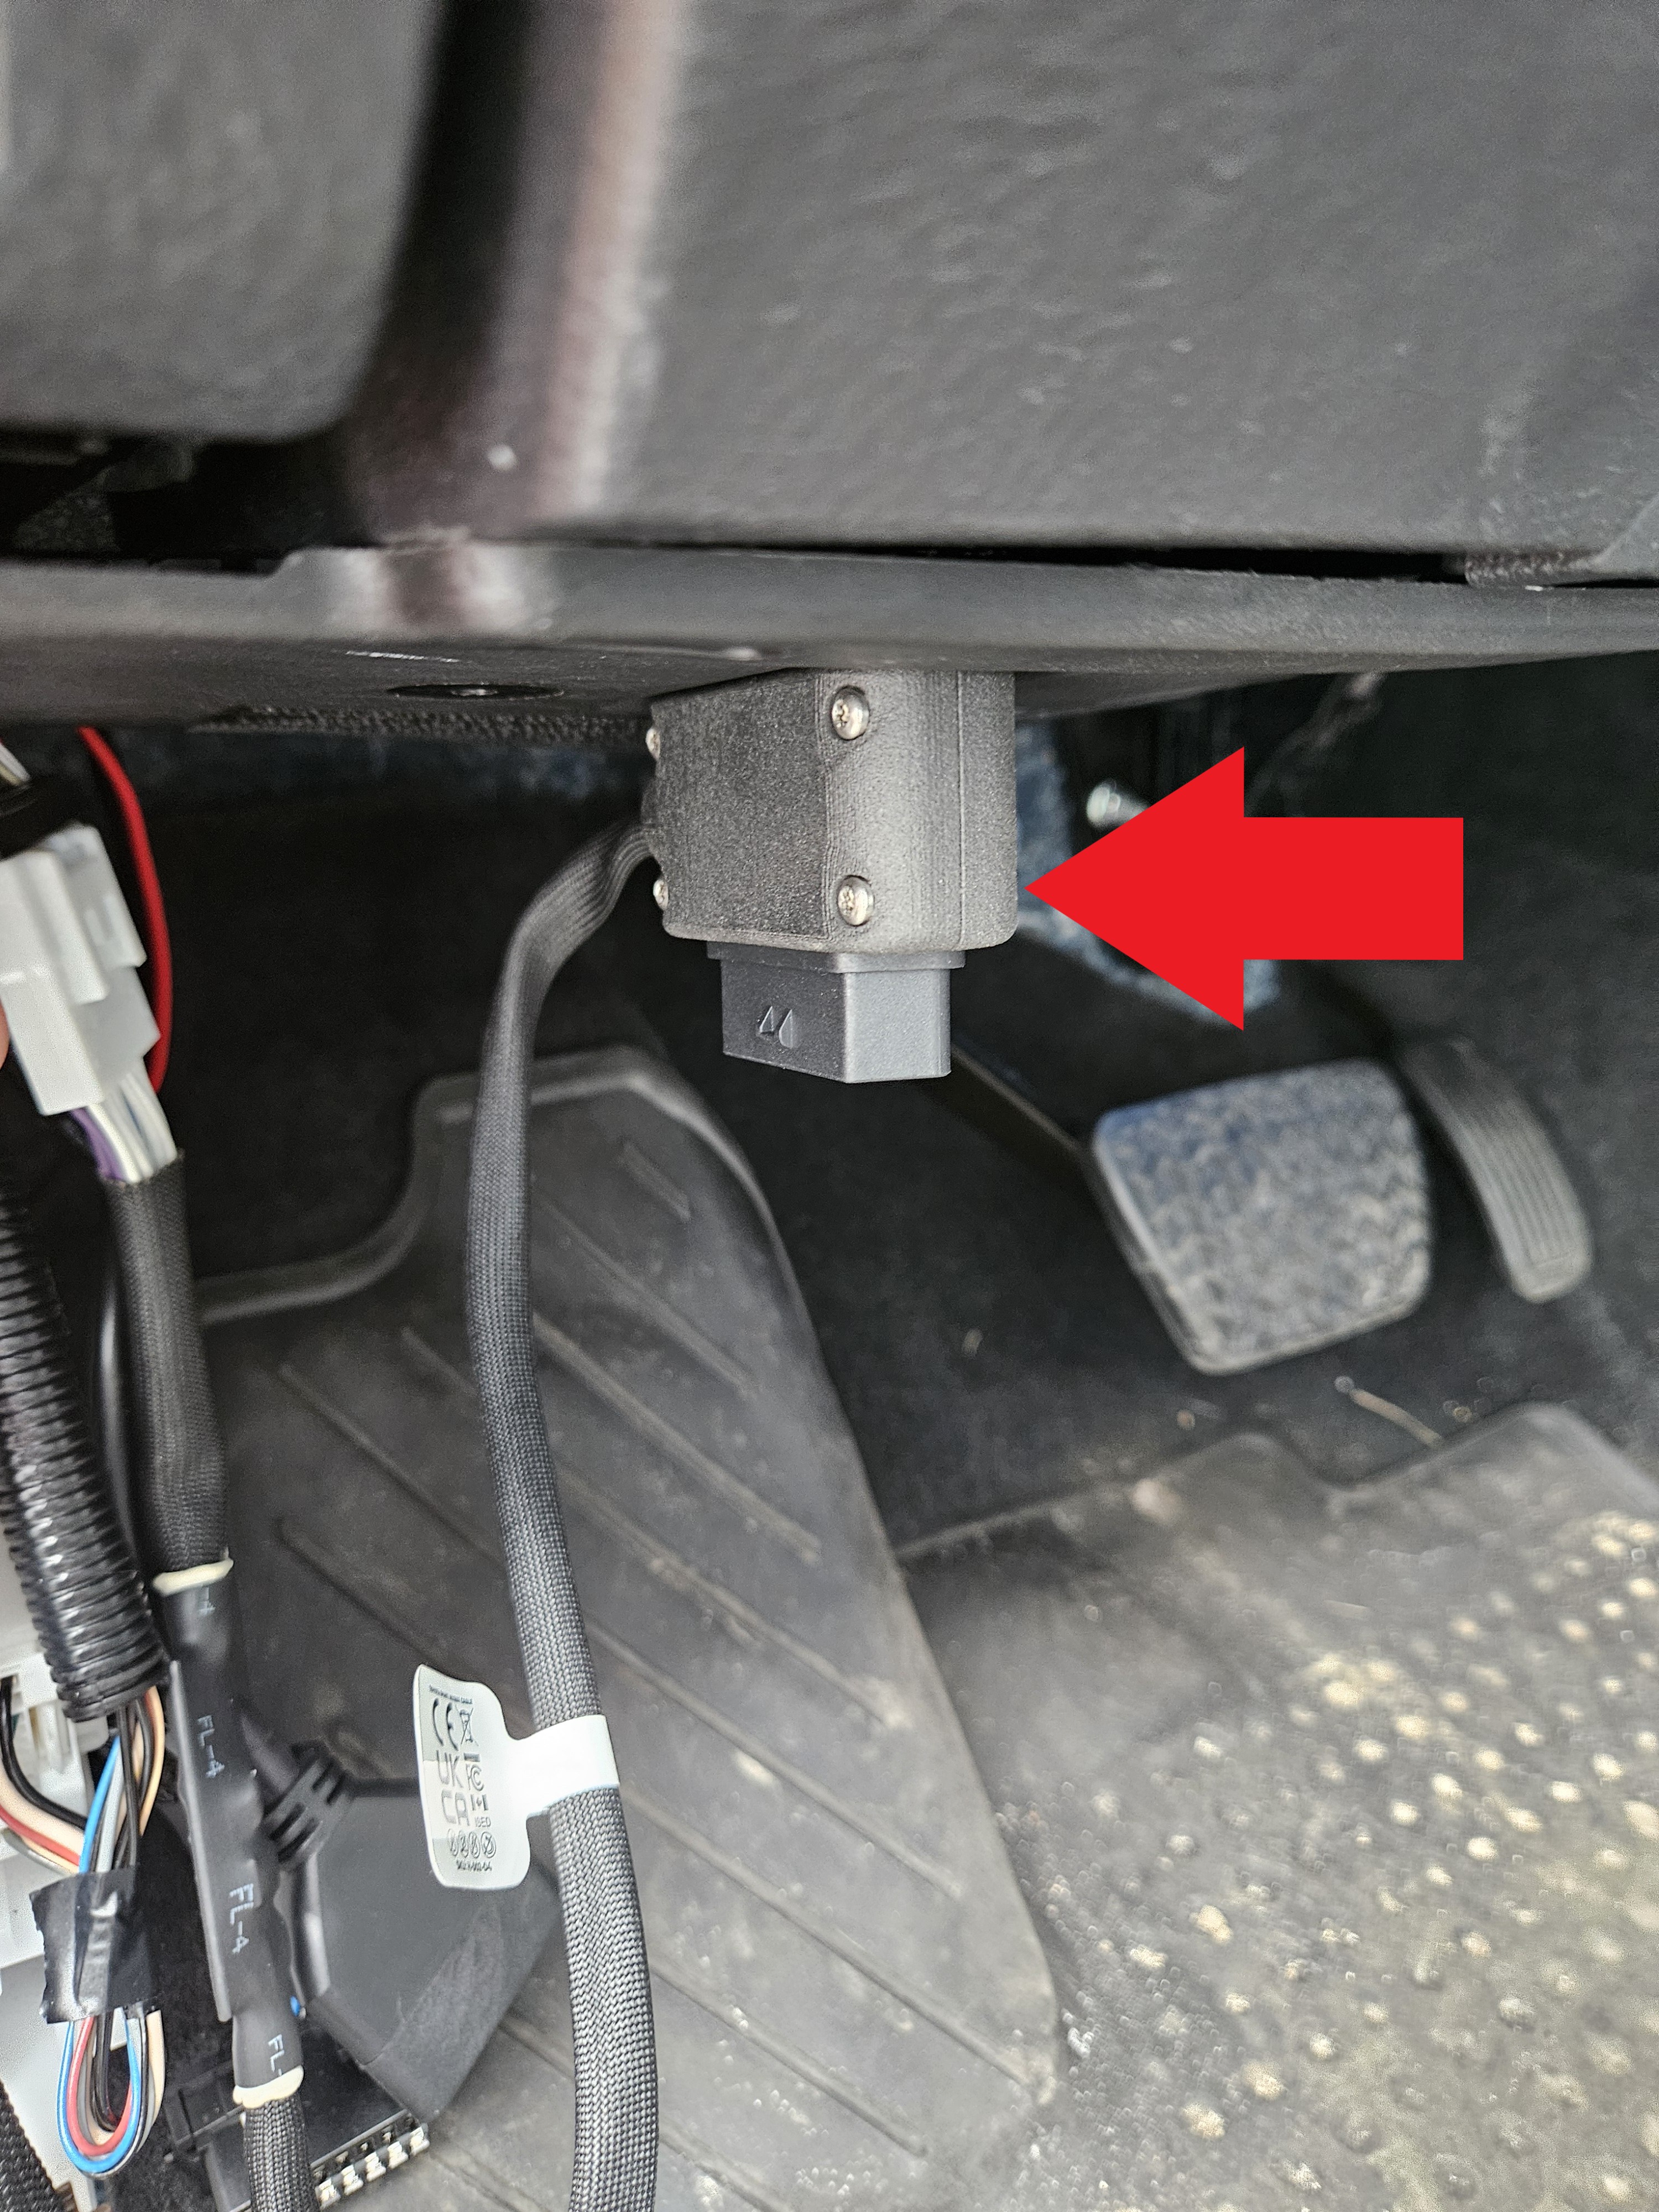
-
Tuck any excess cable away and reassemble the vehicle trim in reverse order.
-
Connect your MPVI4/RTD4 to the Smart Access Cable.
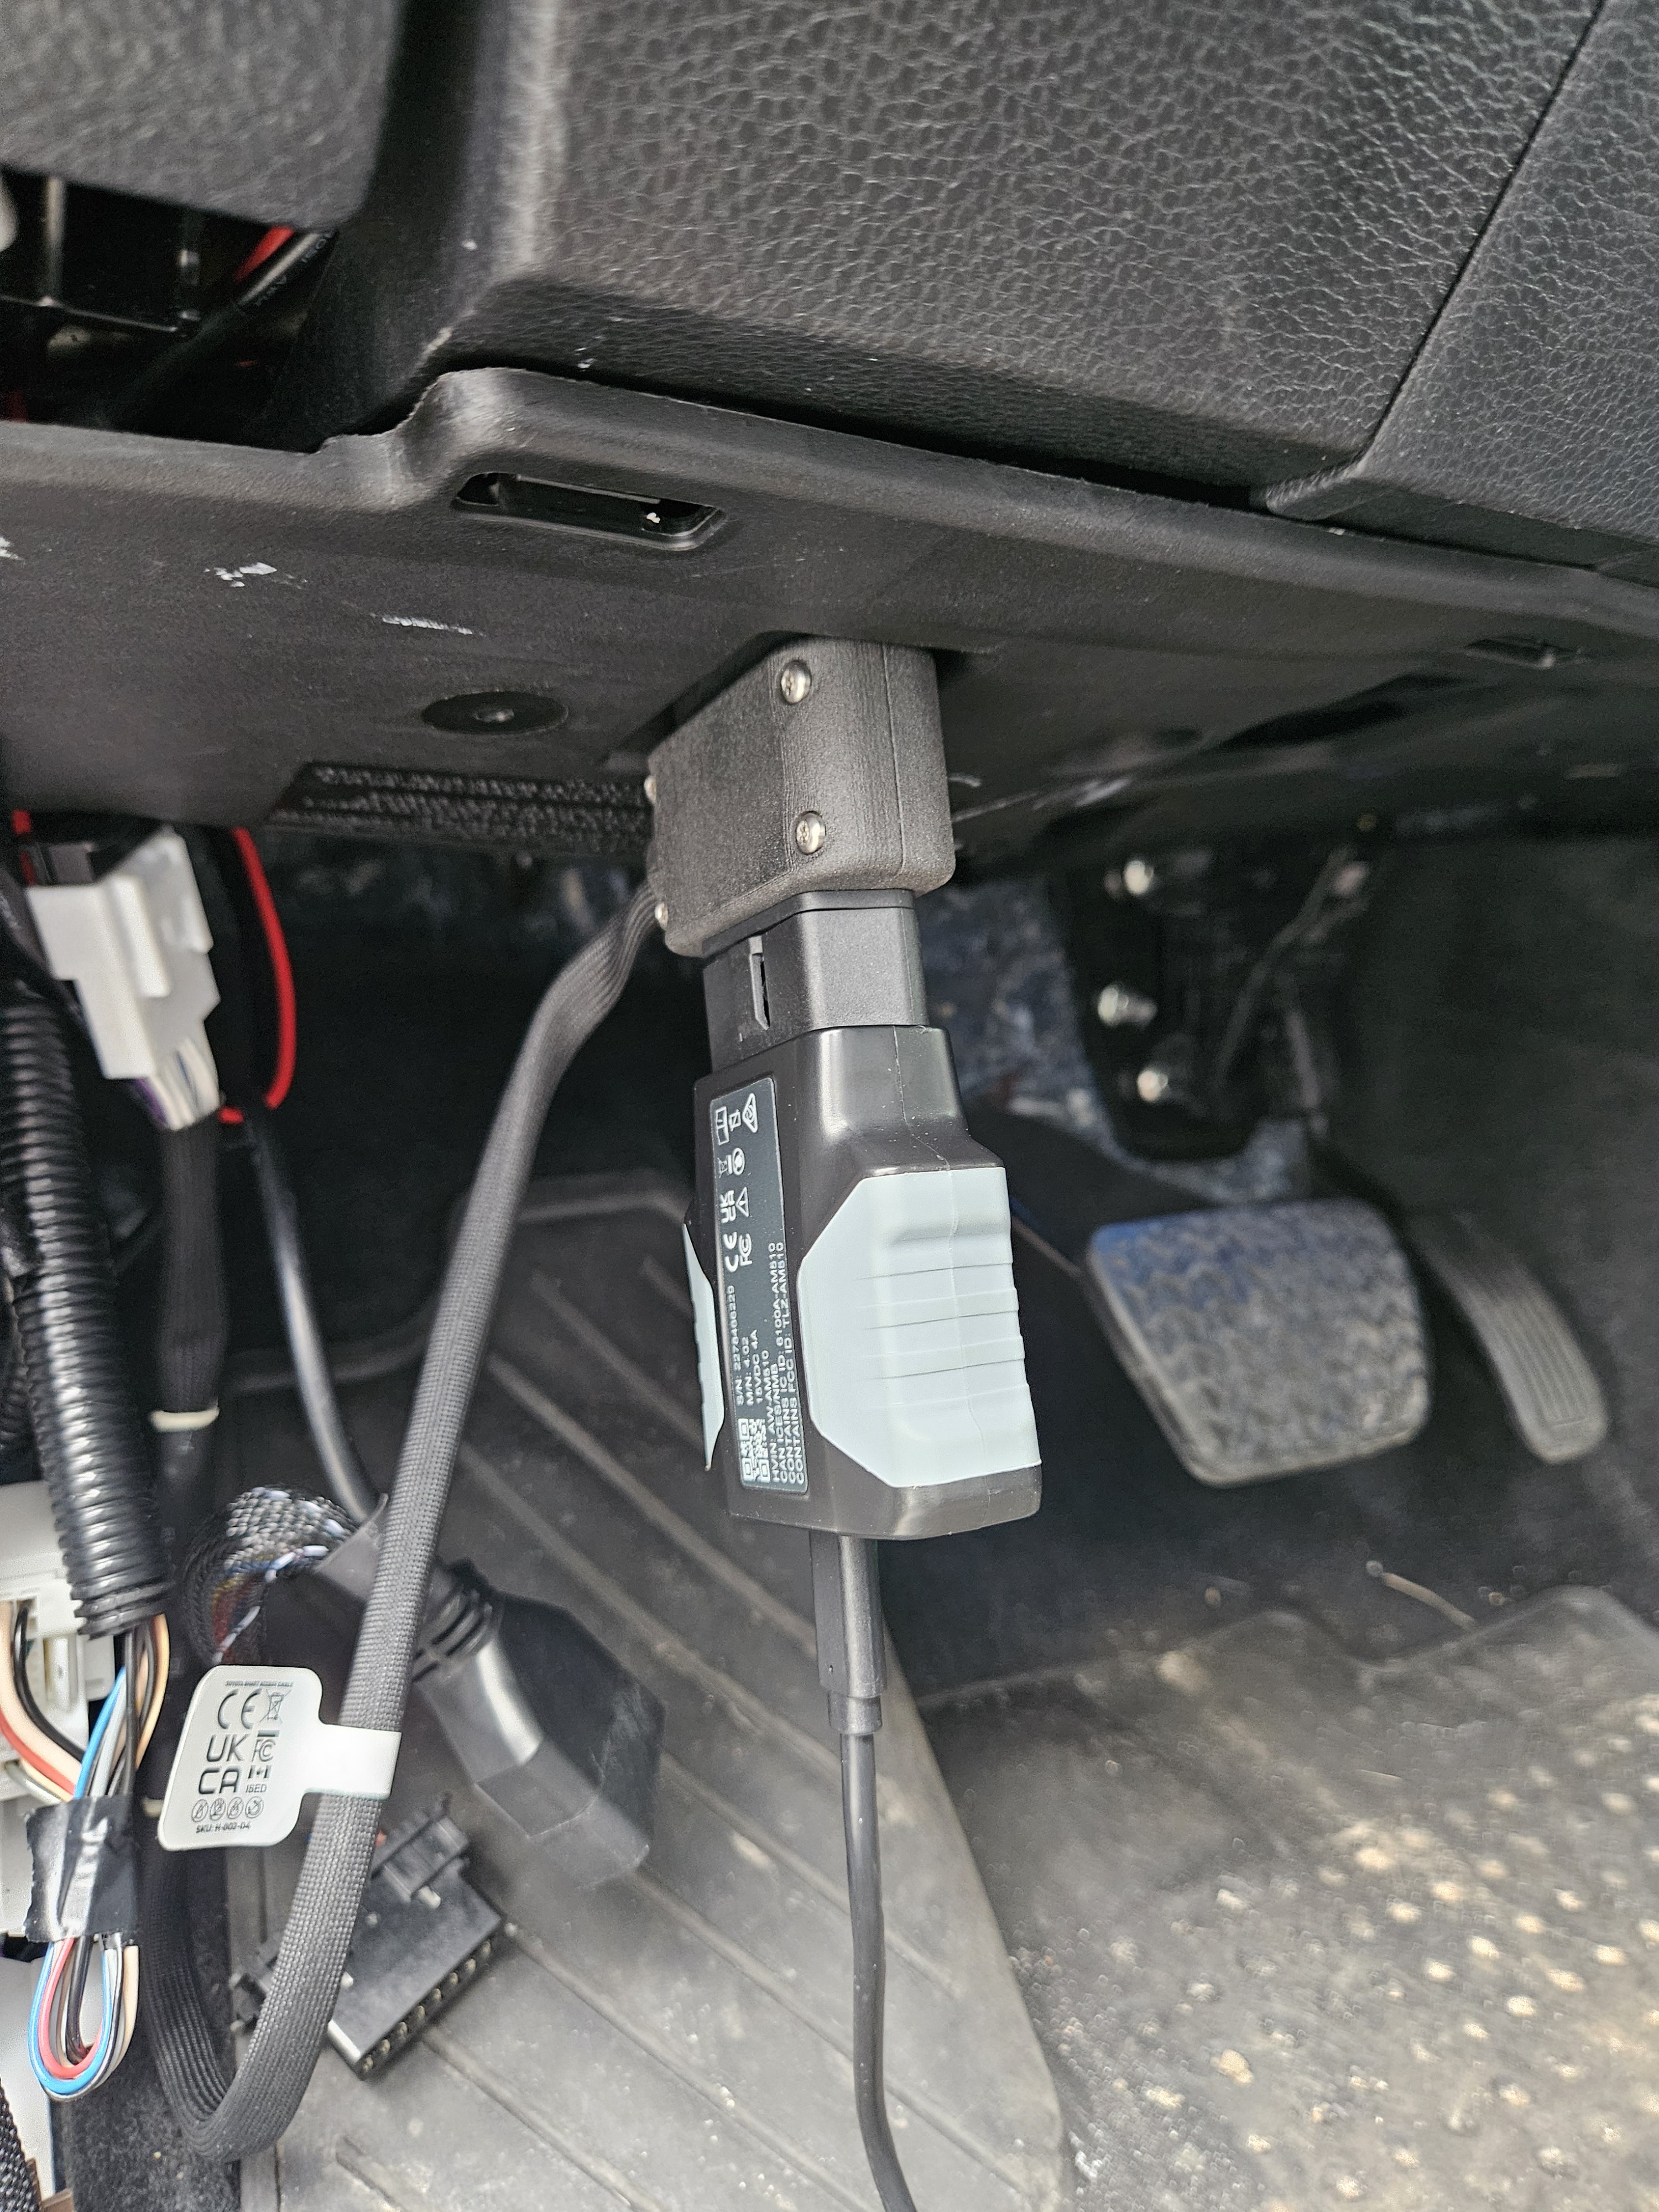
-
Download the latest VCM Suite.
-
Connect to your MPVI4/RTD4 and get started!
Caution
Ensure vehicle is KOEO (Key on, Engine Off) before reading the vehicle.
Note
Utilize the VCM Editor documentation to begin tuning your Toyota.