MPVI2 Interface
The Pro Feature Set license is required to make use of Standalone Data Logging, most vehicles are supported. Below outlines how to configure your MPVI2 if you purchased the Pro Feature set.
Configuring your MPVI2 After Purchasing the Pro Feature Set
-
Open VCM Scanner Beta, download the latest version of VCM Scanner Beta here.
-
Connect your MPVI2 to your vehicles OBDII port.
-
Connect your MPVI2 to your laptop via USB cable.
-
Click Help > Resync Interface on the top menu bar.
-
Click the
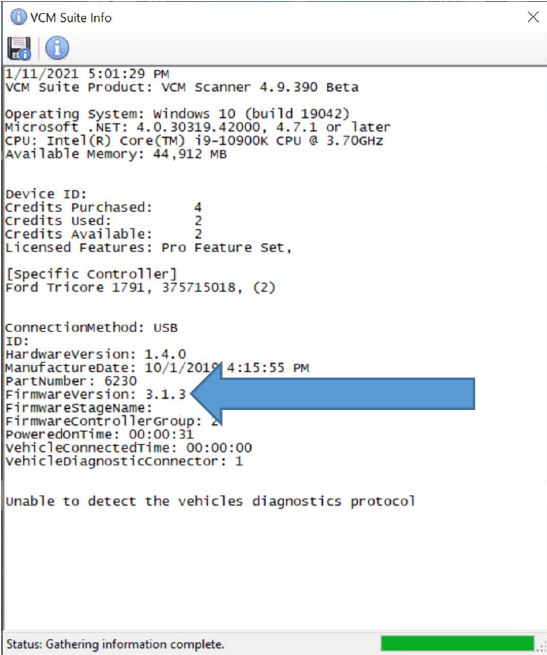
 icon on the top menu bar, a VCM Suite Info window will appear, click the icon again.
 -
Standalone Data logging is only available on firmware v3.1.2 or newer, ensure your firmware is 3.1.2 or newer.
-
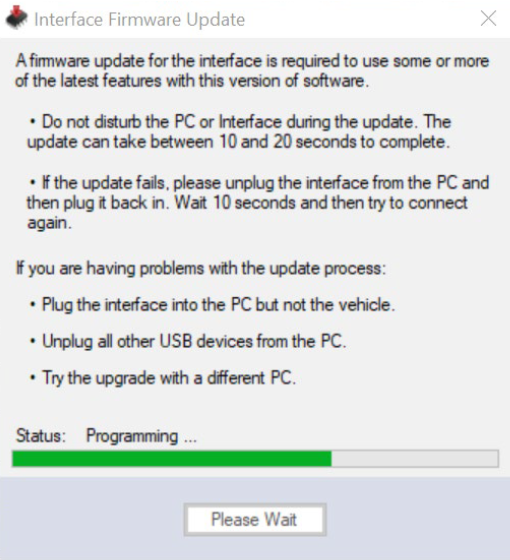
Click Vehicle > MPVI2 Data Logging, a MPVI2 Standalone window will appear, click Resync Interface Resources, please allow 15-20 seconds to update your MPVI2.
-
Your MPVI2 is now configured for the Standalone Data Logging Pro Feature. Use the steps below to start a Standalone Data Logging session.
Starting a Standalone Data Log Using your MPVI2
Note
If you have just configured your MPVI2 with the Pro Feature Set, allow two minutes for the lock-out period to complete. Afterward, reconnect the MPVI2 to your vehicle's OBD port and perform a power cycle (turn vehicle power ON, then OFF).
-
Open VCM Scanner Beta, download the latest version of VCM Scanner Beta here.
-
Connect your MPVI2 to your vehicles OBDII port.
-
Using the USB cable, connect your cable to the MPVI2 and your laptop.
-
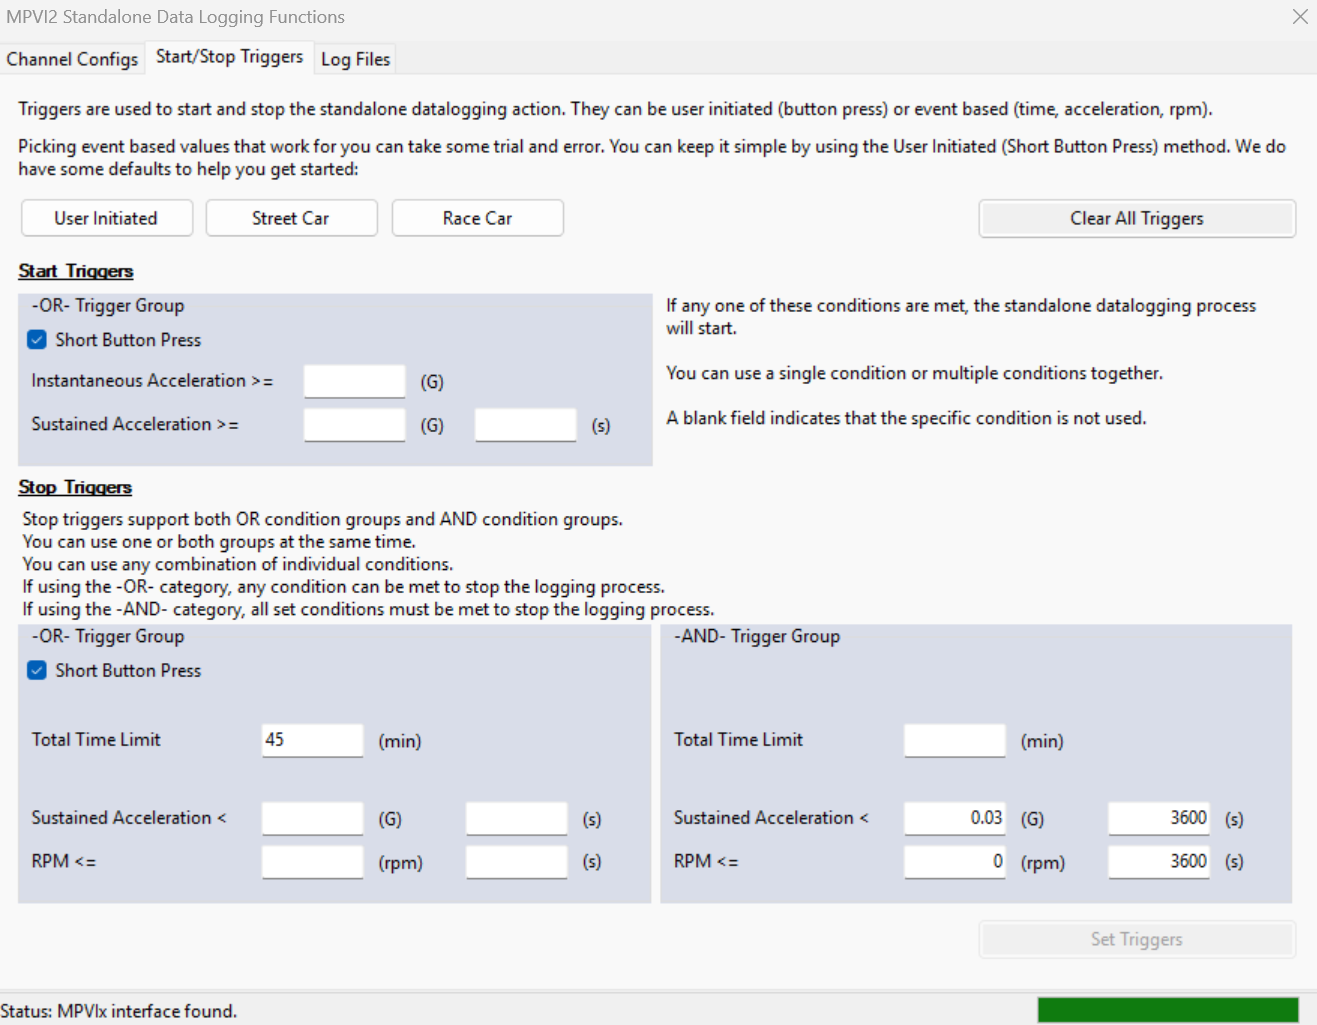
Click Vehicle > MPVI2 Data Logging, when the MPVI2 Standalone Data Logging Functions window appears click the Start/Stop Triggers tab.
-
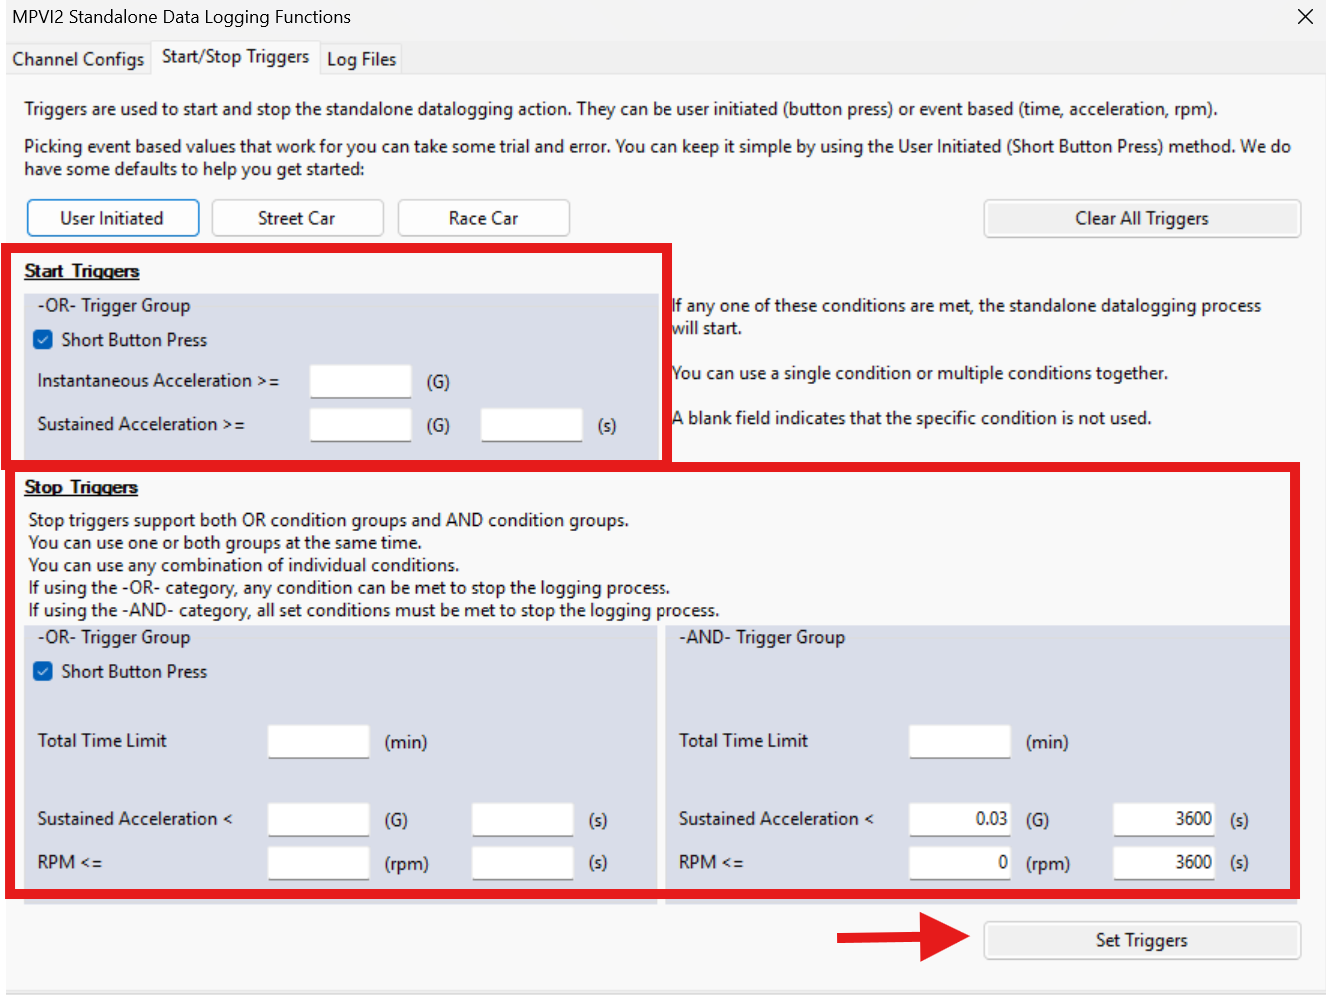
Adjust your start and stop triggers that will enable your standalone data logging, once adjusted to your preferred settings click Set Triggers.
Note
- Standalone Data Logging will only begin to collect data when the USB and bluetooth are disconnected and not being used by VCM Suite or TrackAddict.
- The MPVI2 must be connected via your vehicles OBD port and power must be detected as well.
- Three buttons are available: User Initiated, Street Car, and Race Car. Selecting one auto-populates relevant fields to help you get started.
- Under Start Triggers, you can enter either an instantaneous or sustained acceleration value. Instantaneous acceleration starts logging as soon as the threshold is reached. Sustained acceleration requires a duration for which the value must be exceeded (e.g., 0.05 G for 1 second).
-
If Data Logging is set to trigger via short press, press the button on the MPVI2 to initiate a log.
Note
If your start trigger is event-based (time, acceleration, or RPM), operate the vehicle until it reaches the configured value.
-
The light on the face of the MPVI2 will illuminate amber indicating Data Logging has initiated.
-
When you are done collecting data press the button or operate the vehicle until it reaches the configured stop value.
Note
- If you connect to VCM Suite or TrackAddict while Standalone Data Logging is running, the software will turn off and stop recording.
- If there is no movement and zero RPM for 1 minute, data logging will stop automatically.
- If the MPVI2 is unplugged during Data Logging, data will be lost.
-
Connect to VCM Scanner Beta and view the Data Logs you just collected.
Note
- If you need help locating the Data Log files, see this article.
- If you are still not able to collect data, please create a support ticket.