Getting Started
The following steps are required for new users of VCM Live.
-
If not already installed, download and install VCM Live.
-
Open the download file and follow the initial prompts to complete the installation of VCM Live.
-
Connect to your vehicle.
a. Using an Ethernet cable, connect your computer to the ECU.
Note
- For additional Ethernet connection details, see the CORE Installation Guide.
b. Turn the vehicle ignition to a position that represents key ON, engine OFF. (The vehicle must supply power to the ECU. But, a new ECU will not have a tune, so it shouldn't actually run the vehicle.)
c. Open VCM Live.
d. Click the
 icon in the toolbar to open a data connection to the ECU.
 -
The first time you connect to the ECU, you will be prompted to register it, complete the activation information to unlock your ECU.
-
When connecting to a new ECU, you will need to load an initial tune into the ECU. This is the base configuration from which you will work. To load a base configuration:
a. Click

b. Navigate to Documents\HP Tuners\VCM Live\Tunes.
c. Select a base configuration file that is appropriate to the engine and transmission that will be used with the ECU.
d. Click Open. This will load the selected configuration into VCM Live.
e. Click
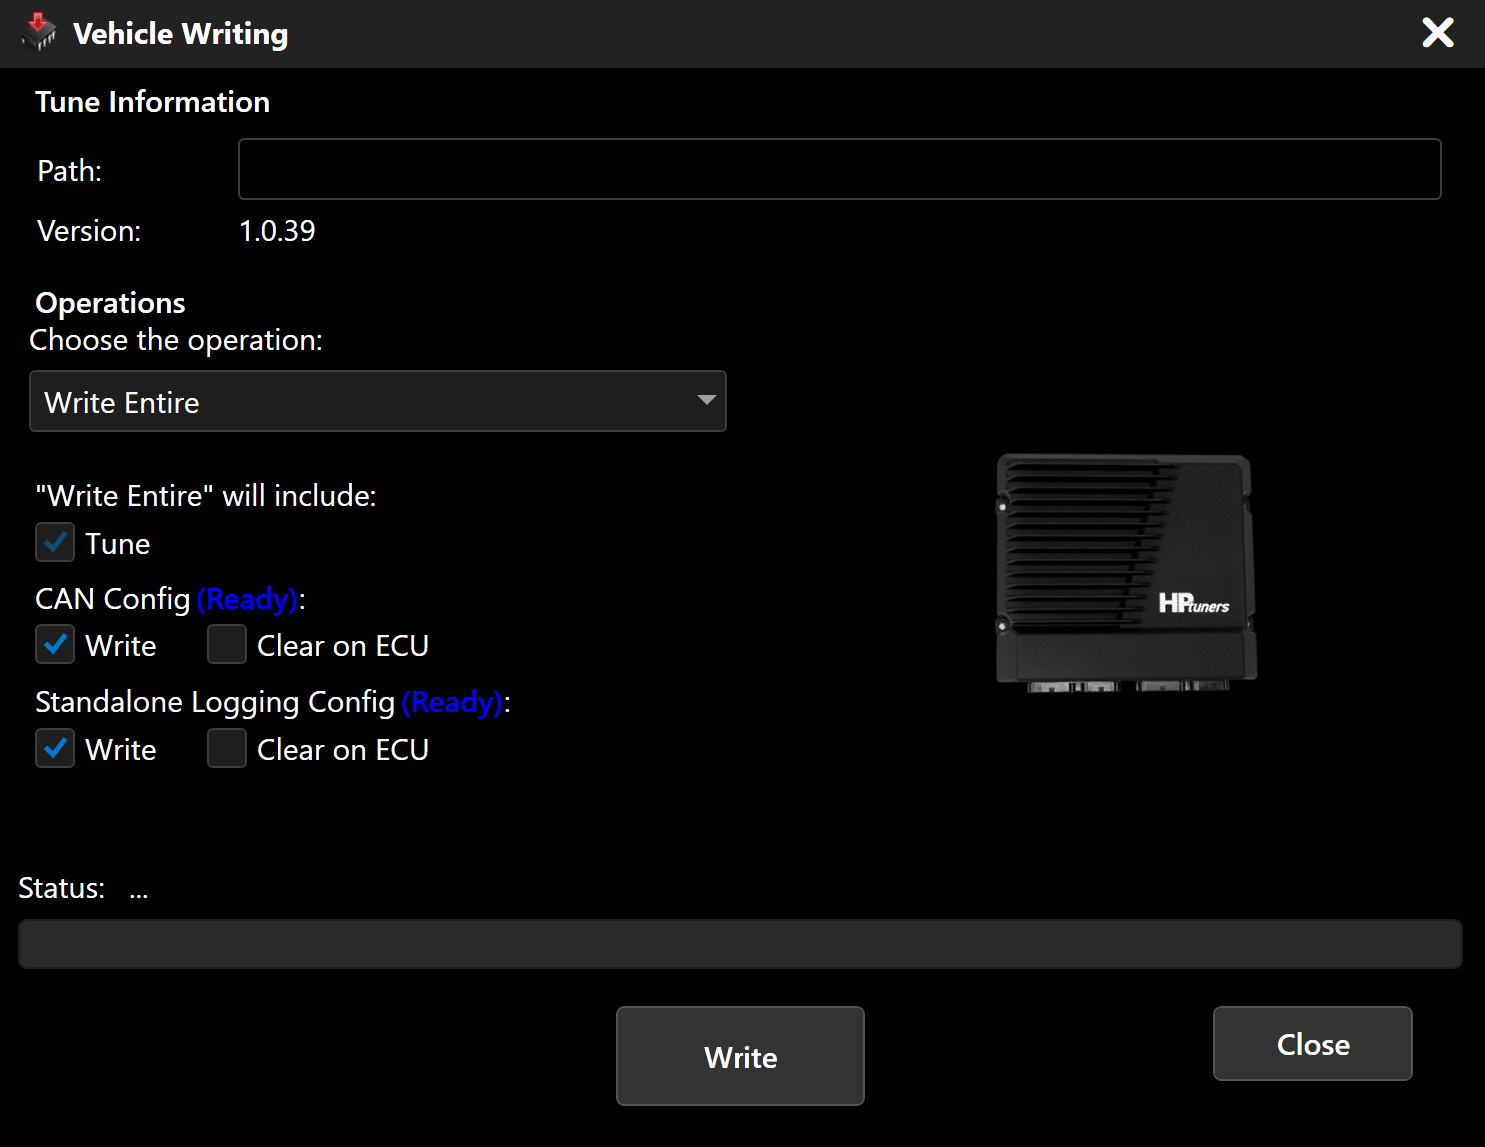
 . The Vehicle Writing window appears.
f. In the Operations box, select Write Entire.
Note
- Write Entire will include writing CAN config files because it is saved within the tune file. Select below g-i steps accordingly.
g. Select the Tune check box if you wish to change the tune file while writing to the vehicle.
h. Under the CAN Config (Ready): select either Write or Clear on ECU to either change the CAN Config file or clear it from the ECU while writing to the vehicle.
i. Under the Standalone Logging Config (Not ready): select either Write or Clear on ECU to either change the standalone logging config file or clear it from the ECU while writing to the vehicle.
j. Click Write. A prompt will appear, asking you to confirm that you wish to perform a write entire operation.
k. Click YES to confirm.
Initial Interface Setup
Follow these steps to configure the VCM Live interface for first time use:
-
Open a base tune that is closest to your current configuration.
-
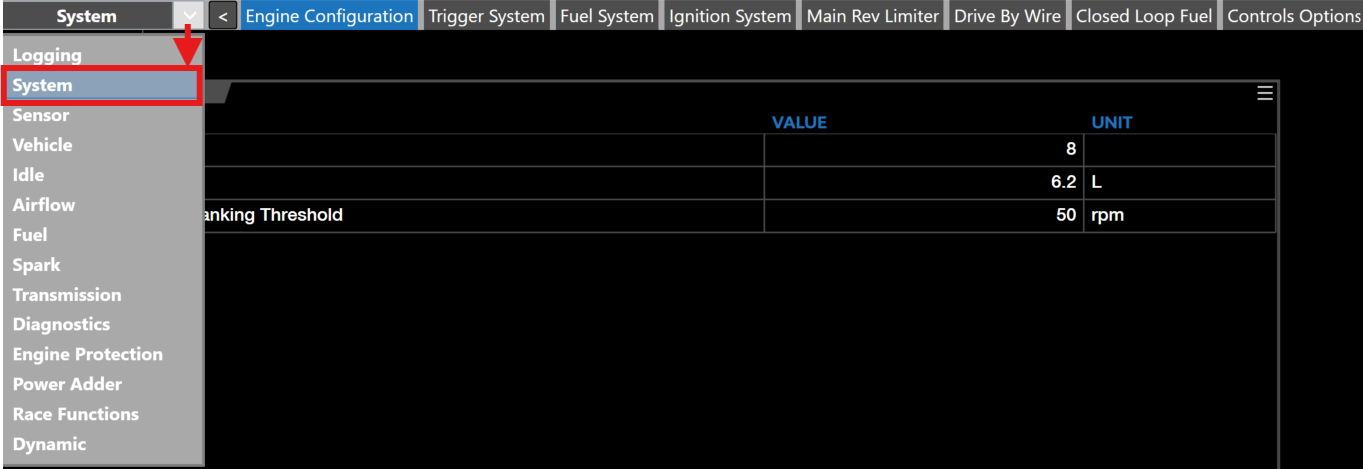
Click the drop down arrow in the group layout tab and select System.
-
Within the System tab go into each System sub-group tabs and input your vehicles information.

-
Click the drop down arrow in the group layout tab again and select Sensor.
-
Within the Sensor tab go into each Sensor sub-group tabs and input your vehicles information.
-
Click the drop down arrow in the group layout tab again and select Vehicle.
-
Within the Vehicle tab go into each Vehicle sub-group tabs and input your vehicles information.
-
Click the
 icon to save your current configuration.
 -
Click ECU > Automatic Throttle Calibration and select your current throttle setup.
Note
Refer to the Automatic Throttle Calibration
-
Click the
icon to save your current configuration. -
Click the drop down arrow in the group layout tab and select Logging.
-
Click the
 icon to start recording.
 -
Ensure all parameters previously calibrated are displaying a proper reading.
-
Click the
 icon to stop recording.
 -
If all parameters are displaying an accurate reading, CORE and VCM Live are now configured. If you are having trouble, utilize the Setup Wizard, instructions can be found below.
Running The Setup Wizard
The Setup Wizard can quickly configure many of the ECU's parameters based on the hardware actually being used in the vehicle (specific sensor types, etc.).
Note
- These parameters can also be individually adjusted if your layout includes a configuration interface for them. The wizard simply provides a quick and easy way to configure multiple parameters to the recommended defaults for your hardware.
-
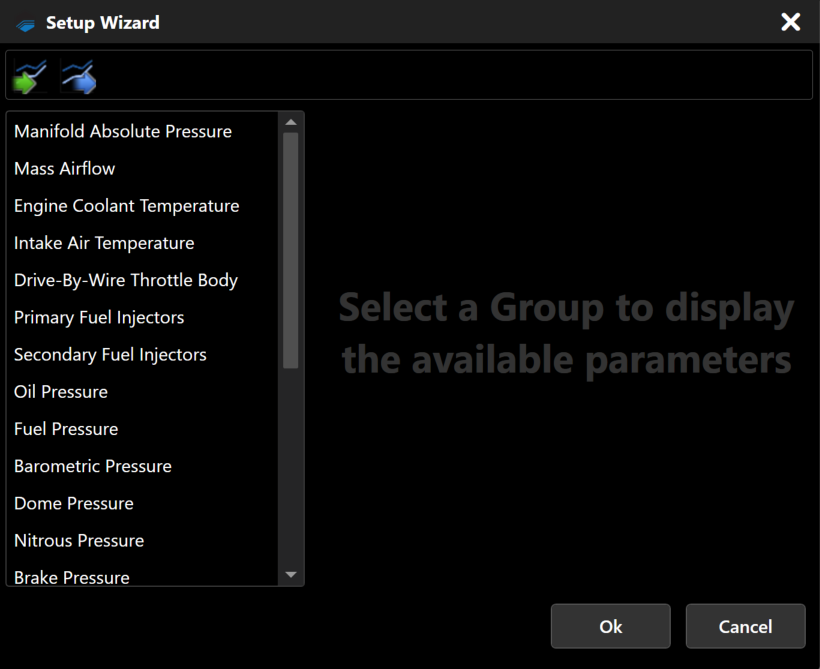
In the menu bar, select Tune > Setup Wizard. The Setup Wizard window appears.
-
In the column on the left, select a group of settings you wish to configure.
-
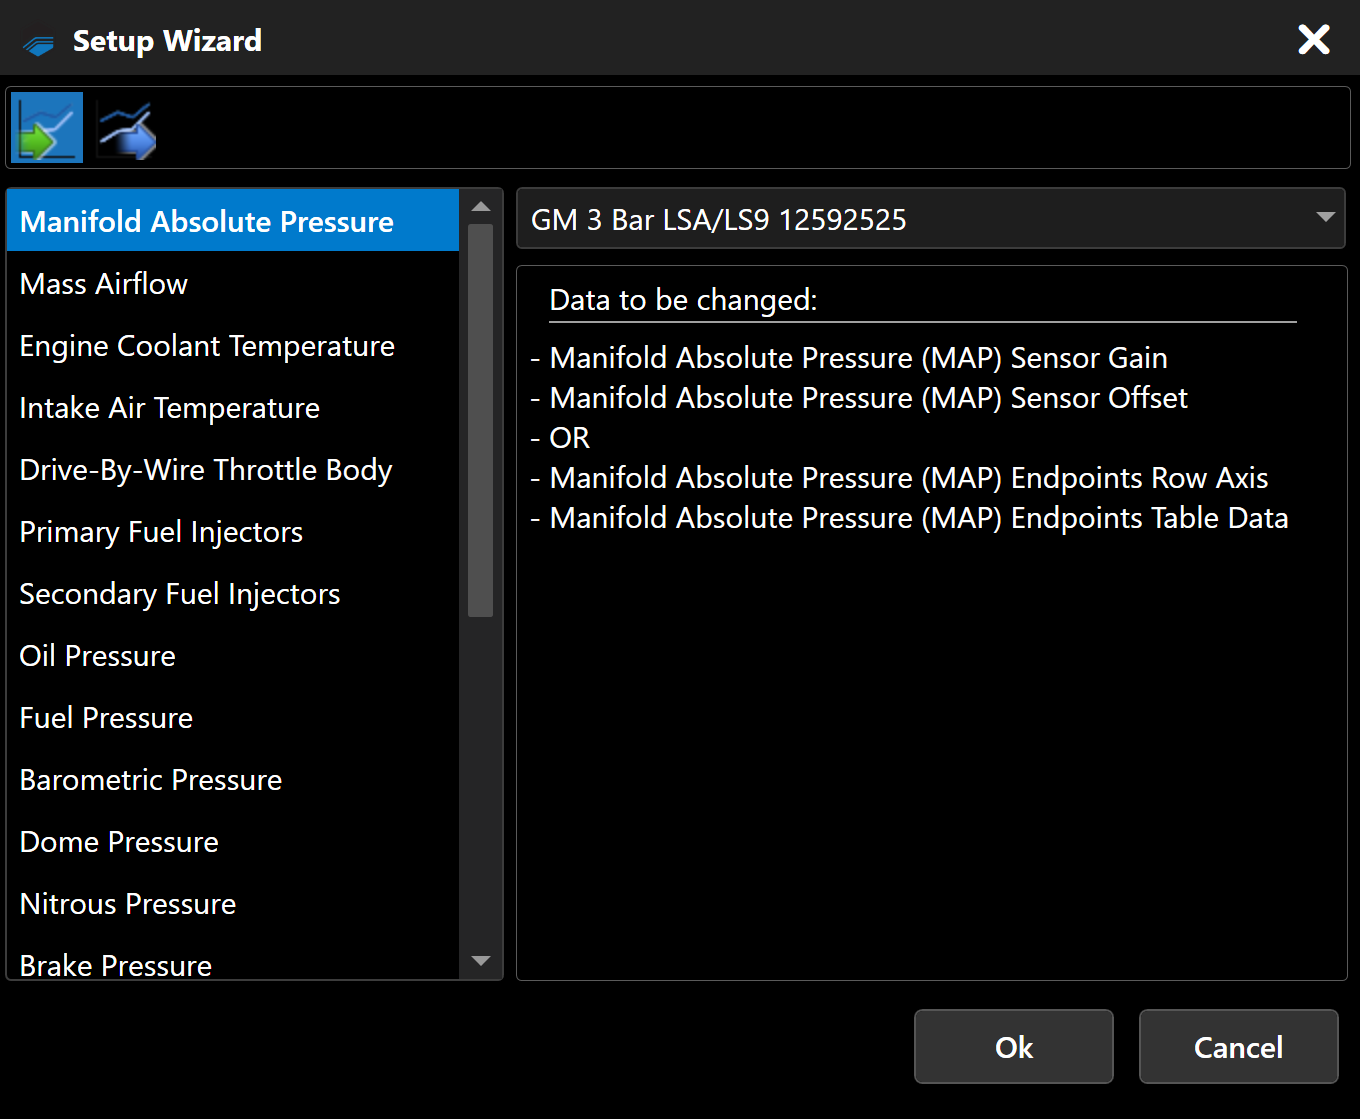
Use the dropdown in the top-right of the wizard window to select the hardware installed in the vehicle. The wizard will list the parameters that it will configure for you.
Note
- For full descriptions of these parameters (and others), see the Parameter Guide.
-
Repeat steps 2 and 3 for each additional group you want the wizard to configure.
-
When you are finished with the groups you want to configure, click Ok.
-
If live tuning is enabled, VCM Live will send these updates to the ECU immediately. If live tuning is NOT enabled, click
to write the updated tune to the vehicle. -
If you need to import a predefined template into the setup wizard, click
 and select the parameter you want to include into the setup wizard and click "Open".
Note
- File format for import and export is .SWT (Setup Wizard Template).
-
If you need to export the current template of the setup wizard, click
 select the parameter you want to remove and click Save.