OBDII Adapter Cable Installation Procedure🔗
The following steps outline the recommended procedures for utilizing your OBDII Adapter Cable.
Required Tools/Items🔗
-
MPVI4
-
12v Battery
Installation Procedure🔗
-
Connect the positive and negative alligator clips to the marine application's 12v battery.
Caution
- To reduce the risk of sparks or electrical damage, always connect the positive (+/red) terminal first.
-
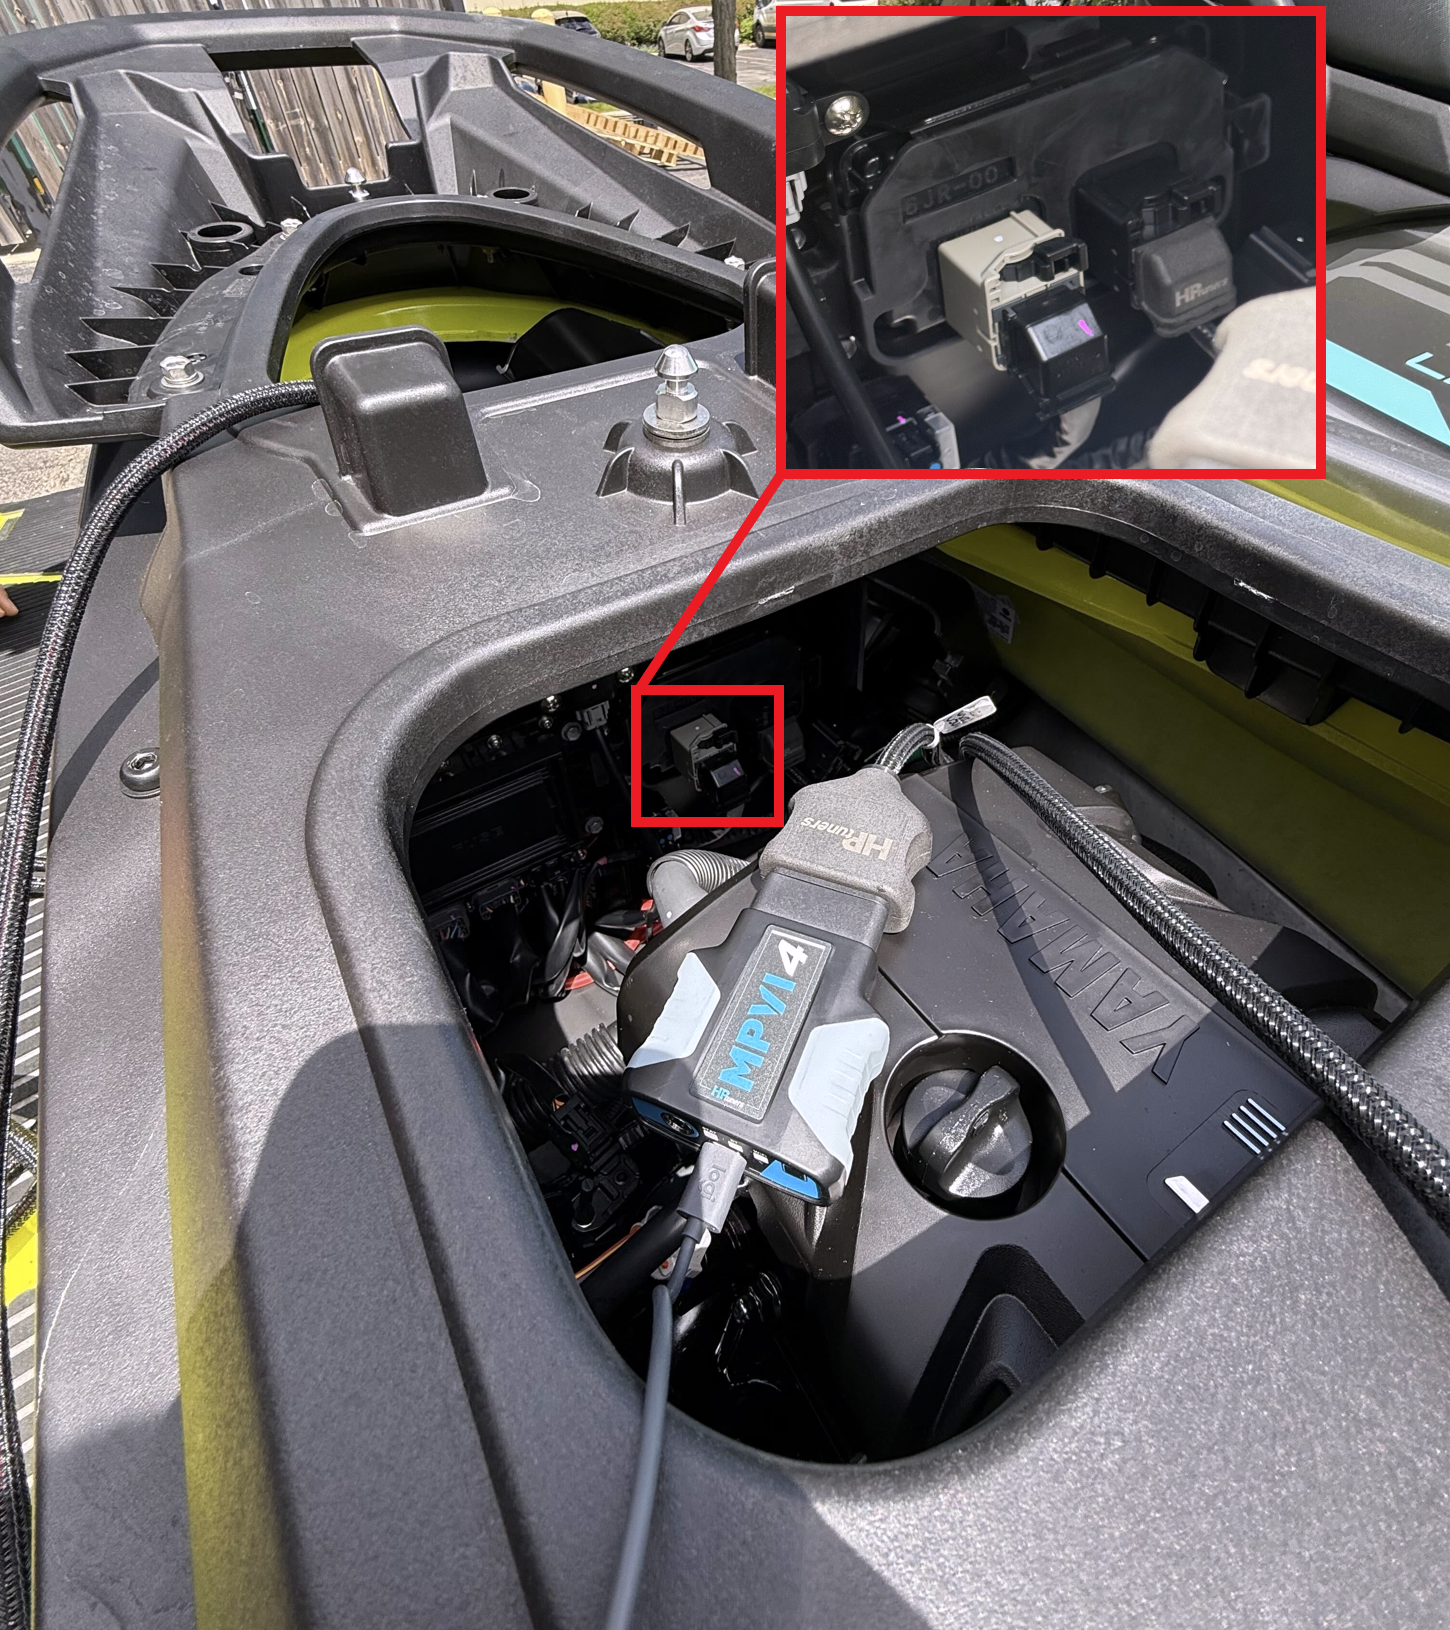
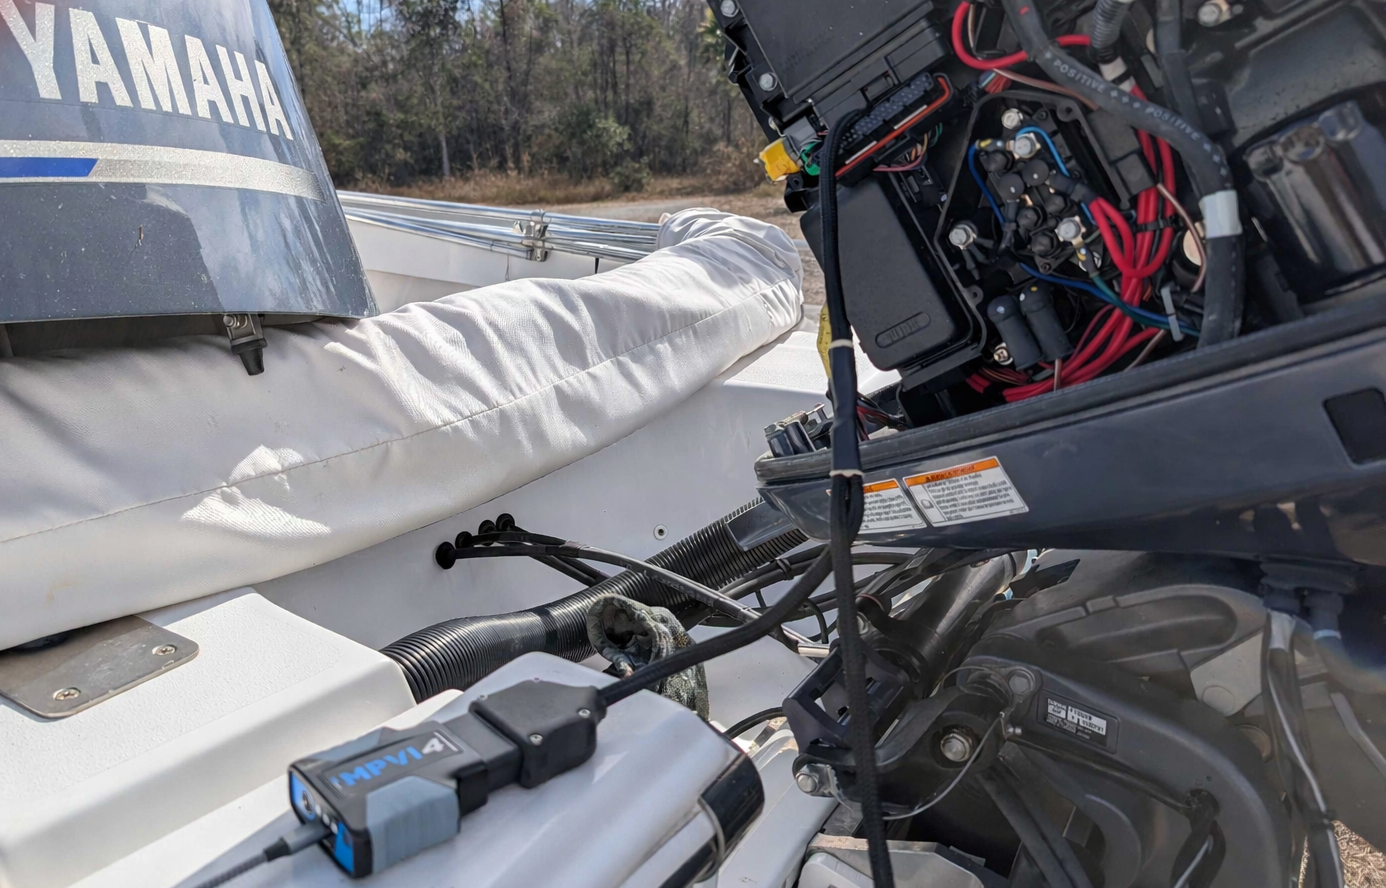
Connect your OBDII adapter cable to your marine application's ECM connector.
Caution
- Ensure power to your marine application's ECM is off (e.g., power switch knob or removing key from ignition).
Note
- Refer to your Yamaha Owner's Manual for the exact location of your ECM connector.
- For the Yamaha 3-pin OBDII adapter cable, locate the marine applications diagnostic connector. Refer to your Yamaha Owner's Manual for the exact location of your diagnostic connector.
-
Connect your MPVI4 to the OBDII adapter cable.
Note
- The above image is referencing the Yamaha outboard 44 pin connector, style 2.
-
Mount the 2 amp fuse away from any and all moving objects.
-
Using a USB-C cable, connect your laptop to your MPVI4 device.
-
Download and connect to VCM Suite and begin tuning!
Note
- Download VCM Suite HERE.
- Refer to VCM Scanner & VCM Editor documentation to help navigate you through both software packages.
- If you are using an RTD device, refer to the TDN App User Guide
Danger
Do not disconnect the white connector from the 1280K Marine Controller during operation. Disconnecting while writing to the ECM will generate a DTC, requiring a manual clear before the adapter cable can function properly (refer to image below).